
Chunky Mittens Knitting Pattern
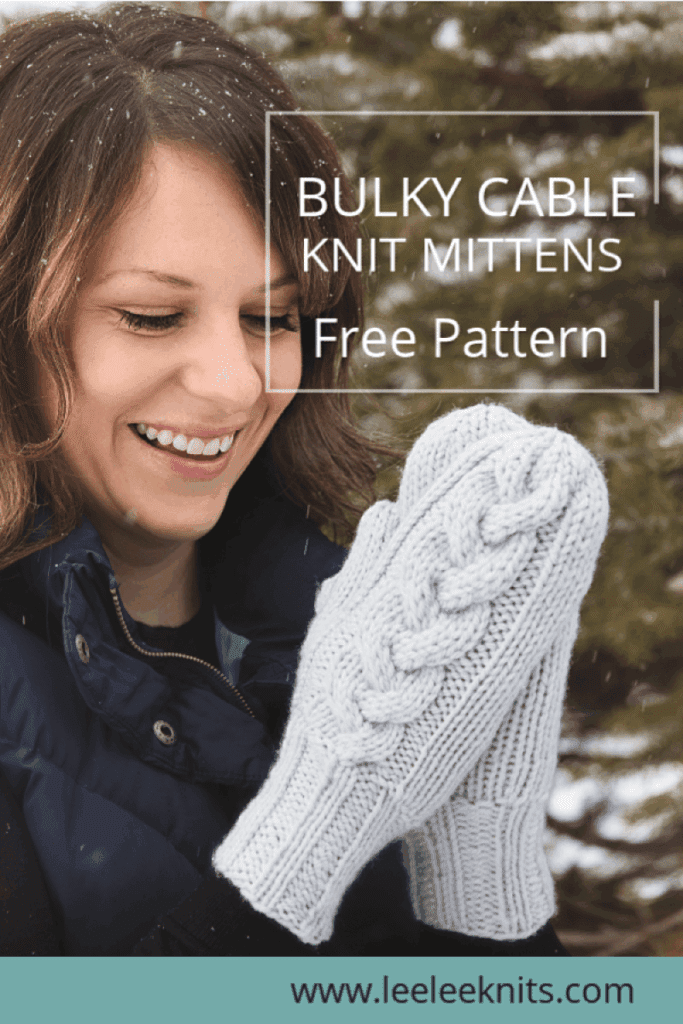
Free Pattern: Cozy Mittens You’ll Love to Knit
Wow, you guys showed so much love for my Easy Knit Mittens pattern that I just had to create another one for you! And this time I decided to use chunky yarn and add some braided cables!
If you’re new to mitten knitting patterns, then I’d definitely suggest starting with my Easy Knit Mittens first because you can just focus on understanding how to knit mittens without any other special techniques. And then once you’ve got the hang of that, these cabled mittens will be a breeze.
My good friend Carlee from Styled To Sparkle was kind enough to model these mittens for me. I met this gorgeous, multi-talented lady at a blogging event and we instantly hit it off. Her blog, Styled To Sparkle is all about life and style for the real girl – which I just love. She writes about food, makeup, travel, home decor, and my very favourite topic – wine! So, go check it out. I know that you’ll love her.
Cozy Mittens Knitting Pattern – What you Need to Know
Magic Loop Method for Knitting in the Round
The pattern for these mittens uses magic loop knitting, which is a technique that allows you to knit small, circular items like socks and mittens using a long circular needle instead of double-pointed needles. The way it works is that you divide your stitches into two sections—one half sits on the flexible cord of the circular needle, while the other half is actively being knit on one of the needle tips. This method is my favourite for circular projects because I despise juggling double pointed needles! I plan to make a video tutorial on magic loop knitting soon but in the mean time, if you search YouTube, there are already so many helpful helpful videos out there to get you started.
Knitting Cable Stitches
This knit mittens pattern also features a braided cable along the top of the hand. If you haven’t tried knitting cables yet, don’t worry. Cable knitting just means that you move stitches around before knitting them with the help of a cable hook. By doing this, the stitches are twisted around each other, therefore creating textured patterns that pop off the fabric.
Check out my tutorial on cable knitting by clicking on the following if you are new to knitting cables: How to Knit Cables.
Please note that some of the links on this page are affiliate links and I will therefore earn a commission if you purchase through these links. I use all of the products listed on this page and recommend them because they are companies that I have found helpful and trustworthy. Please let me know if you have any questions about anything I have recommended!
Chunky Cable Knit Mittens Pattern
Materials:
You will need the following supplies to make these warm knit mittens:
- Size 7 (4.5mm) circular knitting needles (cord should be at least 24”).
- 1 skein (149 yards) of Paintbox Yarns Simply Chunky yarn in Misty Grey.
- Cable Stitch Holder.
- Yarn Needle.
- Ruler or tape measure.
- Detachable stitch marker.
Ad Free PDF File
This cozy cabled chunky mittens knitting pattern is available right here on this page, as this site is sustained through ad support.
If you like things a little more streamlined, I’ve put together an ad-free, downloadable PDF version of the pattern. It’s perfect for easy printing and can be can be purchased through My Ravelry Store or by clicking the “Purchase PDF File” button to the right.
Thank you so much for your support! It means the world to me, and I’m beyond grateful to be able to share my passion with you all.
Gauge:
4.5 stitches, 6 rows = 1″ in stockinette stitch.
Size:
These stretchy mittens are perfect for medium-sized women’s hands.
Abbreviations and Stitches:
K: Knit.
Stockinette Stitch: Worked in the round, knit every round.
C6F: Cable 6 Front (slip 3 stitches onto your cable needle to the front of your work, knit the next three stitches, then knit the three stitches off of the cable needle).
C6B: Cable 6 Back (slip 3 stitches onto your cable needle to the back of your work, knit the next three stitches, then knit the three stitches off of the cable needle).
K2P2 Rib: Worked in the round (multiple of 4 stitches). *K2P2; repeat from * to end of round.
K2Tog: Knit Two Together decrease.
Kfb: Knit Front and Back increase.
M1L: Make one left increase.
M1R: Make one right increase.
PM: Place Stitch Marker.
Notes:
These knit mittens are worked in the round from the cuff up, using the Magic Loop method and circular knitting needles. If you do not already have experience with this method, please read/watch some tutorials before you begin so that you feel comfortable with this method. The pattern can also be adapted for double pointed needles.
Free Chunky Cabled Mittens Knitting Pattern
Cuff:
Cast on 24 stitches and then work in a K2P2 rib for 20 rounds. Continue to Hand (Left) or Hand (Right).
Hand (Left):
Round 1: *K2, Kfb; repeat from * to end of round (32 stitches).
Shift stitches so that front needle has 19 and back needle has 13.
Round 2 & 3: K6, P2, K9, P2, K13 (32 stitches).
Round 4: K6, P2, C6B, K3, P2, K13 (32 stitches).
Round 5: K6, P2, K9, P2, K13 (32 stitches).
Round 6: K3, PM, K3, P2, K9, P2, K13 (32 stitches).
Round 7: K1, M1L, K1, M1R, K1, PM, K3, P2, K9, P2, K13 (34 stitches).
Round 8: K8, P2, K3, C6F, P2, K13 (34 stitches).
Round 9: K8, P2, K9, P2, K13 (34 stitches).
Round 10: K1, M1L, K3, M1R, K1, PM, K3, P2, K9, P2, K13 (36 stitches).
Round 11: K10, P2, K9, P2, K13 (36 stitches).
Round 12: K10, P2, C6B, K3, P2, K13 (36 stitches).
Round 13: K1, M1L, K5, M1R, K1, PM, K3, P2, K9, P2, K13 (38 stitches).
Round 14: K12, P2, K9, P2, K13 (38 stitches).
Round 15: K12, P2, K9, P2, K13 (38 stitches).
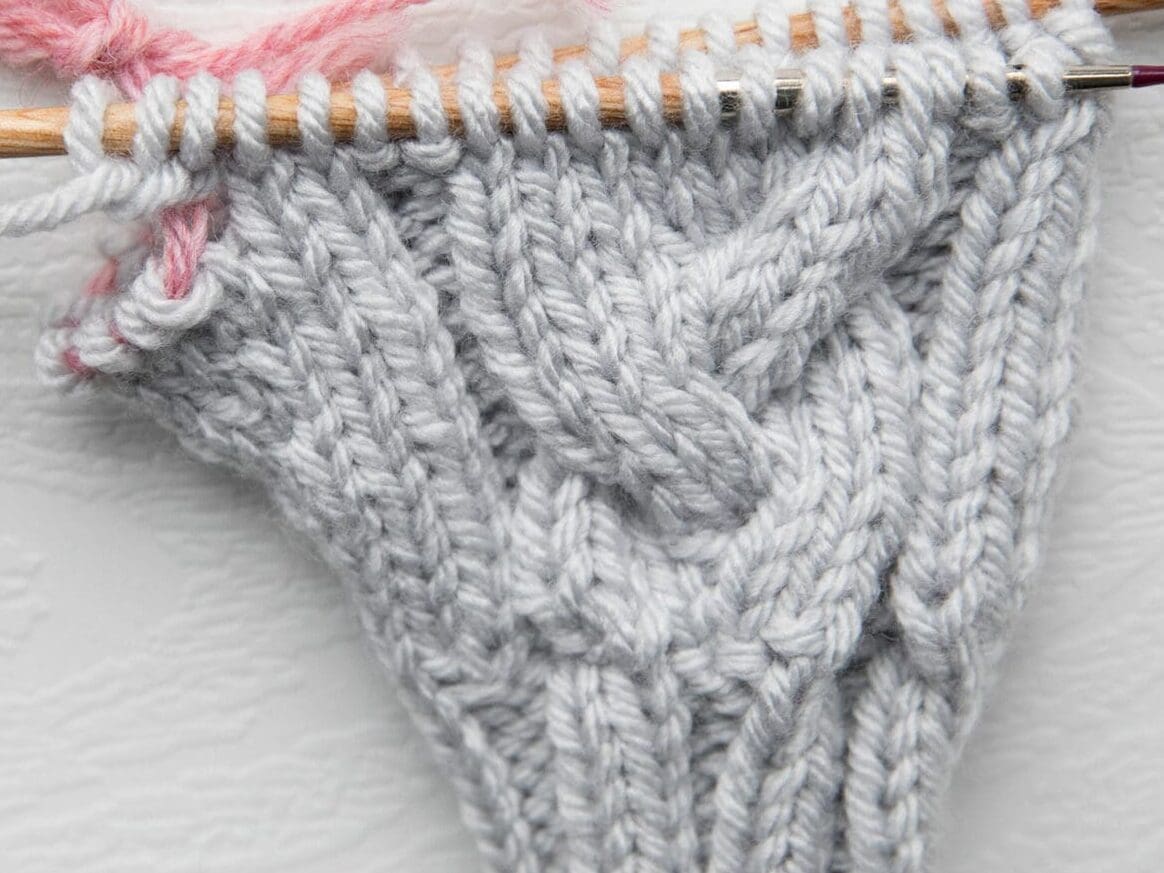
At this point, the mitten should look like the photo below. The first 9 stitches before the stitch marker are the thumb gusset stitches used in knitting the thumb.

Using a yarn or tapestry needle, transfer the nine thumb gusset stitches to a piece of scrap yarn and secure. Then cast on 3 stitches (thumb cast on method works well) with working yarn to replace the original 3 stitches that we used in the thumb gusset. See photo below.

Round 16: K3, P2, K3, C6F, P2, K16 (32 Stitches).
Rounds 17-19: K3, P2, K9, P2, K16 (32 stitches).
Round 20: K3, P2, C6B, K3, P2, K16 (32 stitches).
Round 21-23: K3, P2, K9, P2, K16 (32 stitches).
Repeat rounds 16-23 two more times.
Shape the top of the top of the mitten as follows:
Round 1: K3, P2, K3, C6F, P2, K16.
Round 2: *K2, K2Tog; repeat from * to end of round (24 stitches).
Round 3: Knit all stitches (24 stitches).
Round 4: *K1, K2Tog; repeat from * to end of round (16 stitches)..
Round 5: Knit all stitches (16 stitches)..
Round 6: *K2Tog; repeat from * to end of round (8 stitches)..
Cut yarn (leave a 6 inch tail) and then pull through yarn needle. Then thread through the remaining stitches and pull tight. Pull yarn through to inside of mitten and secure on the inside.
Fasten off and then continue to Thumb.
Hand (Right):
Round 1: *K2, Kfb; repeat from * to end of round (32 stitches).
Round 2 & 3: K17, P2, K9, P2, K2 (32 stitches).
Round 4: K17, P2, C6B, K3, P2, K2 (32 stitches).
Round 5: K17, P2, K9, P2, K2 (32 stitches).
Round 6: K3, PM, K14, P2, K9, P2, K2 (32 stitches).
Round 7: K1, M1L, K1, M1R, K1, PM, K14, P2, K9, P2, K2 (34 stitches).
Round 8: K19, P2, K3, C6F, P2, K2 (34 stitches).
Round 9: K19, P2, K9, P2, K2 (34 stitches).
Round 10: K1, M1L, K3, M1R, K1, PM, K14, P2, K9, P2, K2 (36 stitches).
Round 11: K21, P2, K9, P2, K2 (36 stitches).
Round 12: K21, P2, C6B, K3, P2, K2 (36 stitches).
Round 13: K1, M1L, K5, M1R, K1, PM, K14, P2, K9, P2, K2 (38 stitches).
Round 14: K23, P2, K9, P2, K2 (38 stitches).
Round 15: K23, P2, K9, P2, K2 (38 stitches).
At this point, the mitten should look like the photo below. The first 9 stitches before the stitch marker are the thumb gusset stitches used in knitting the thumb.

Using a yarn or tapestry needle, transfer the nine thumb gusset stitches to a piece of scrap yarn and secure. Then cast on 3 stitches (thumb cast on method works well) with working yarn to replace the original 3 stitches that we used in the thumb gusset. See photo below.

Round 16: K14, P2, K3, C6F, P2, K5 (32 stitches).
Rounds 17-19: K14, P2, K9, P2, K5 (32 stitches).
Round 20: K14, P2, C6B, K3, P2, K5 (32 stitches).
Round 21-23: K14, P2, K9, P2, K5 (32 stitches).
Repeat rounds 16-23 two more times.
Shape the top of the top of the mitten as follows:
Round 1: K14, P2, K3, C6F, P2, K5.
Round 2: *K2, K2Tog; repeat from * to end of round (24 stitches).
Round 3: Knit all stitches (24 stitches).
Round 4: *K1, K2Tog; repeat from * to end of round (16 stitches)..
Round 5: Knit all stitches (16 stitches)..
Round 6: *K2Tog; repeat from * to end of round (8 stitches)..
Cut yarn (leave a 6 inch tail) and then pull through yarn needle. Then thread through the remaining stitches and pull tight. Pull yarn through to inside of mitten and secure on the inside.
Fasten off and then continue to Thumb.
Thumb:
Pick up the thumb stitches with circular needle and then remove the scrap yarn. See photo below and notice the big gap above where you inserted the needle.

Slide the thumb stitches down onto the cord and then pick up three stitches around the gap by knitting into them. It’s not an exact science where to pick up these stitches, and you can look up some techniques for preventing a hole (there are plenty of YouTube videos). Also, don’t worry if you do not pick them up in a way that closes the hole entirely because you can use the tail from where you attached the yarn to sew up any gaps when you weave in the ends.

There will be 3 stitches on one needle and 9 on the other for a total of 12 stitches. Knit in the round in stockinette stitch (knit all stitches) for 12 rounds. Then re-arrange the stitches so that there are 6 on each needle and then continue to Shaping Thumb Top.
Shaping Thumb Top:
Round 1: *K1, K2Tog; repeat from * to end of the round (total of 8 stitches).
Round 2: Knit all stitches.
At this point, there will be 4 stitches on each needle. Cut yarn (leave a 4 inch tail) and then pull through yarn needle. Thread through the remaining stitches and pull tight. Then pull yarn through to inside of thumb and secure on the inside.
Continue to Finishing.
Finishing:
Flip mitten inside out and then secure and weave in all ends. If there’s a gap in the thumb gusset where the yarn is attached, then this is where you can use the tail to sew it up.
Pattern PDF File
I hope you enjoyed this free knitting pattern.
If you’d like your own copy, the Ad-Free PDF file (which will be emailed to you automatically) can be purchased through Ravelry, or by clicking the “Purchase PDF File” button to the right.
Thank you so much for your support! It means the world to me, and I’m beyond grateful to be able to share my passion with you all.
According to my count Round 6 has 32 stitches and round 7 has 36 (not 34) stitches so my purl stitches are landing right over the cable (not over the previous round’s purls as I would expect them to). Am I counting incorrectly or is there an error in the pattern?
Hi Lynne, You are increasing two stitches on round 7, so the count would be 32+2=34… hope that helps!
But, if you add up round 7 it actually adds up to 36 stitches. Is the free pattern accurate as:
K1, M1L, K3, M1R, K1, PSM, K3, P2, K9, P2, K13 adds up to 36 for me
M1L and M1R are only one stitch each
that is row 10, this is row 7
Round 7: K1, M1L, K1, M1R, K1, PSM, K14, P2, K9, P2, K2 (34 stitches).
Thank you for this lovely pattern! It’s such a quick knit! Just one minor thing to note, Round 14 and 15 should both start with K23 instead of K21.
Thank you Christina! I’ve updated the pattern 🙂
Thank you for this nice pattern.
I notice a mistake on round 14 and 15 of the right hand: we should read: k23 instead of 21 since there is an increase of 2 st on round 13.
Thank you! I’ve updated the pattern 🙂
What is meant by PSM
Place Stitch Marker 🙂
If I buy the pattern do I get different sizes? I want a womens large
Hi Lynne, this pattern only comes in one size. You can adjust the length by knitting more rows before you decrease for longer fingers, or alternatively go up a size with the needles so that it the mittens are more loosely knit and have more give.
I can’t wait to try my hand at theses mittens. Would Cascade 128 Superwash Yarn work with this project? I’ve never knitted anything with merino but I’m thinking it would be appropriate for mittens. But I’m a beginner knitter and I’m not sure if the weight would be comparable to the yarn you’re using!
Hi Karine,
It looks like it should be a good match! I would suggest making a small swatch first to check the gauge just to be safe!
Can you tell me what PSM is, round 6 of “hand”? I know PM is place marker, but not sure about PSM. Can’t find anything online. Thanks!
Hi Kathy – it just means place stitch marker. My apologies as that is not the standard abbreviation.