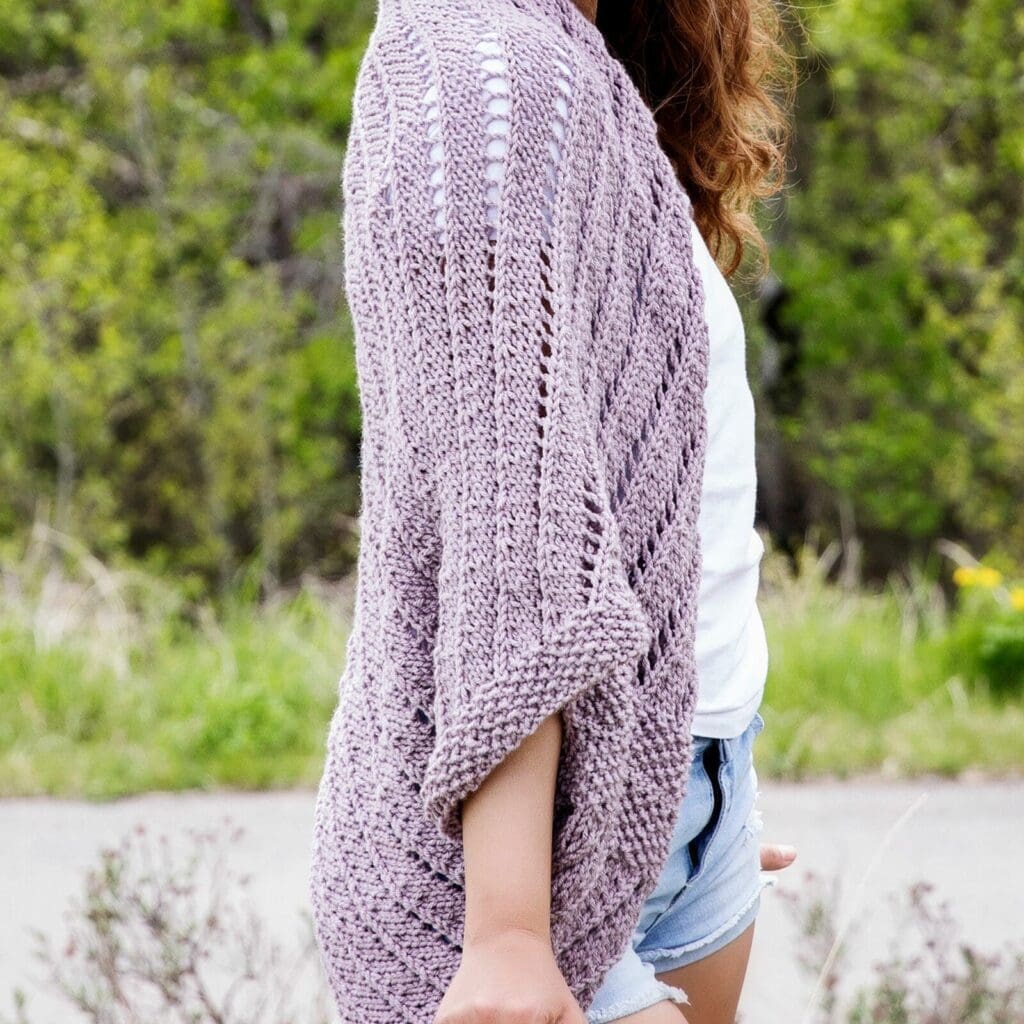
Cocoon Cardigan Knitting Pattern

It’s finally warming up here in Canada, so I thought I’d create a fun spring/summer friendly cocoon cardigan knitting pattern to share with you all!
What is a Cocoon Cardigan?
If you haven’t come across a cocoon cardigan yet, this style of sweater is just a shawl with arm holes. All you need to do is knit one large rectangular piece of fabric, and then fold the corners over to create arm holes! Best of all, there’s less need to worry about sizes or taking body measurements since this loose-fitting blanket style sweater will fit most body types as its meant to be flowy.
That said, it’s super easy to adjust the size of this cardigan if you’d like it to be wider! The pattern begins with a cast-on of 106 stitches, which follows a multiple of 5 plus 12. Since the gauge is 4.5 stitches per inch, every extra 5 stitches you add will increase the width by just over an inch. So, for example, casting on 116 stitches would make your cardigan about 2 inches wider. You can also make it longer simply by knitting additional rows!
Save This Pattern!
Feel free to share the love by posting a link to this free pattern on your social media or saving it to Pinterest for later.
I truly appreciate all of you who get the word out about this site and my patterns!
❤️
Alnaar

Please note that some of the links on this page are affiliate links and I will earn a commission if you purchase through these links. I use all of the products listed on this page and recommend them because they are companies that I have found helpful and trustworthy. Please let me know if you have any questions about anything I have recommended!
Materials:
To make this lace knit summertime sweater, you will need:
- US 10.5 (or 6.5 mm) Knitting Needles (14” if using straight, 32” if using circular).
- 4 Skeins of Knit Picks Brava Worsted Weight Yarn in Seraphim.
- Scissors.
- Tapestry/Yarn needle.
Ad Free PDF File
The free pattern for this knit cocoon cardigan is available right here on this page, as this site is sustained through ad support.
If you like things a little more streamlined, I’ve put together an ad-free, downloadable PDF version of the pattern. It’s perfect for easy printing and can be can be purchased through My Ravelry Store or by clicking the “Purchase PDF File” button to the right.
Thank you so much for your support! It means the world to me, and I’m beyond grateful to be able to share my passion with you all.
Size:
One Size Fits All: Pattern makes a loose-fitting blanket style sweater that will fit most body types.
Gauge:
18 rows, 14 stitches = 4 inches in stockinette stitch.
Abbreviations:
| K | Knit |
| P | Purl |
| K2Tog | Knit two together |
| YF | Yarn Forward |
More Free Patterns From Leelee Knits!


Pattern:
Note: This sweater is created in one piece as a rectangle that measures: 35” wide X 42” long. The corners are then folded over to create the sleeves and shape the neckline (see Assemble Sweater section below for details).
Cast on 112 Stitches using long tail cast on method.
Complete Rows 1- 8 to create the bottom border of the sweater in seed stitch:
Rows 1, 3, 5, 7: *K1, P1; repeat from * to end of row.
Rows 2, 4, 6, 8: *P1, K1; repeat from * to end of row.
Repeat rows 9-18 until your work measures just over 40”.
Row 9: K1, P1, K1, P1, K1, P1; *K3, K2Tog, YF; repeat from * to last 6 stitches; K1, P1, K1, P1, K1, P1.
Rows 10, 12, 14, 16, 18: P1, K1, P1, K1, P1, K1; Purl to last 6 stitches; P1, K1, P1, K1, P1, K1.
Row 11: K1, P1, K1, P1, K1, P1, K2, K2Tog, YF; *K3, K2Tog, YF; repeat from * to last 7 stitches; K2, P1, K1, P1, K1, P1.
Row 13: K1, P1, K1, P1, K1, P1, K1, K2Tog, YF; *K3, K2Tog, YF; repeat from * to last 8 stitches; K3, P1, K1, P1, K1, P1.
Row 15: K1, P1, K1, P1, K1, P1, K2Tog, YF; *K3, K2Tog, YF; repeat from * to last 9 stitches; K4, P1, K1, P1, K1, P1.
Row 17: K1, P1, K1, P1, K1, K2Tog, YF; *K3, K2Tog, YF; repeat from * to last 10 stitches; K5, P1, K1, P1, K1, P1.
Repeat rows 1-8 once more to complete top trim/border.
Cast off in pattern and weave in the loose ends with a yarn needle. Continue to Assemble Sweater.
Assemble Sweater:
To assemble the sweater, lay the fabric down on a flat surface. Fold over each of the four corners to meet in the middle and sew together (leave an opening of 8.5” for arm holes) to form sleeves.

Wet or steam block to measurements and enjoy your new hand knit cocoon cardigan!
Pattern PDF File
I hope you enjoyed knitting this cocoon cardigan.
If you’d like your own copy, the Ad-Free PDF file (which will be emailed to you automatically) can be purchased through Ravelry, or by clicking the “Purchase PDF File” button to the right.
Thank you so much for your support! It means the world to me, and I’m beyond grateful to be able to share my passion with you all.