Knit Linen Stitch Plus Baby Blanket Pattern
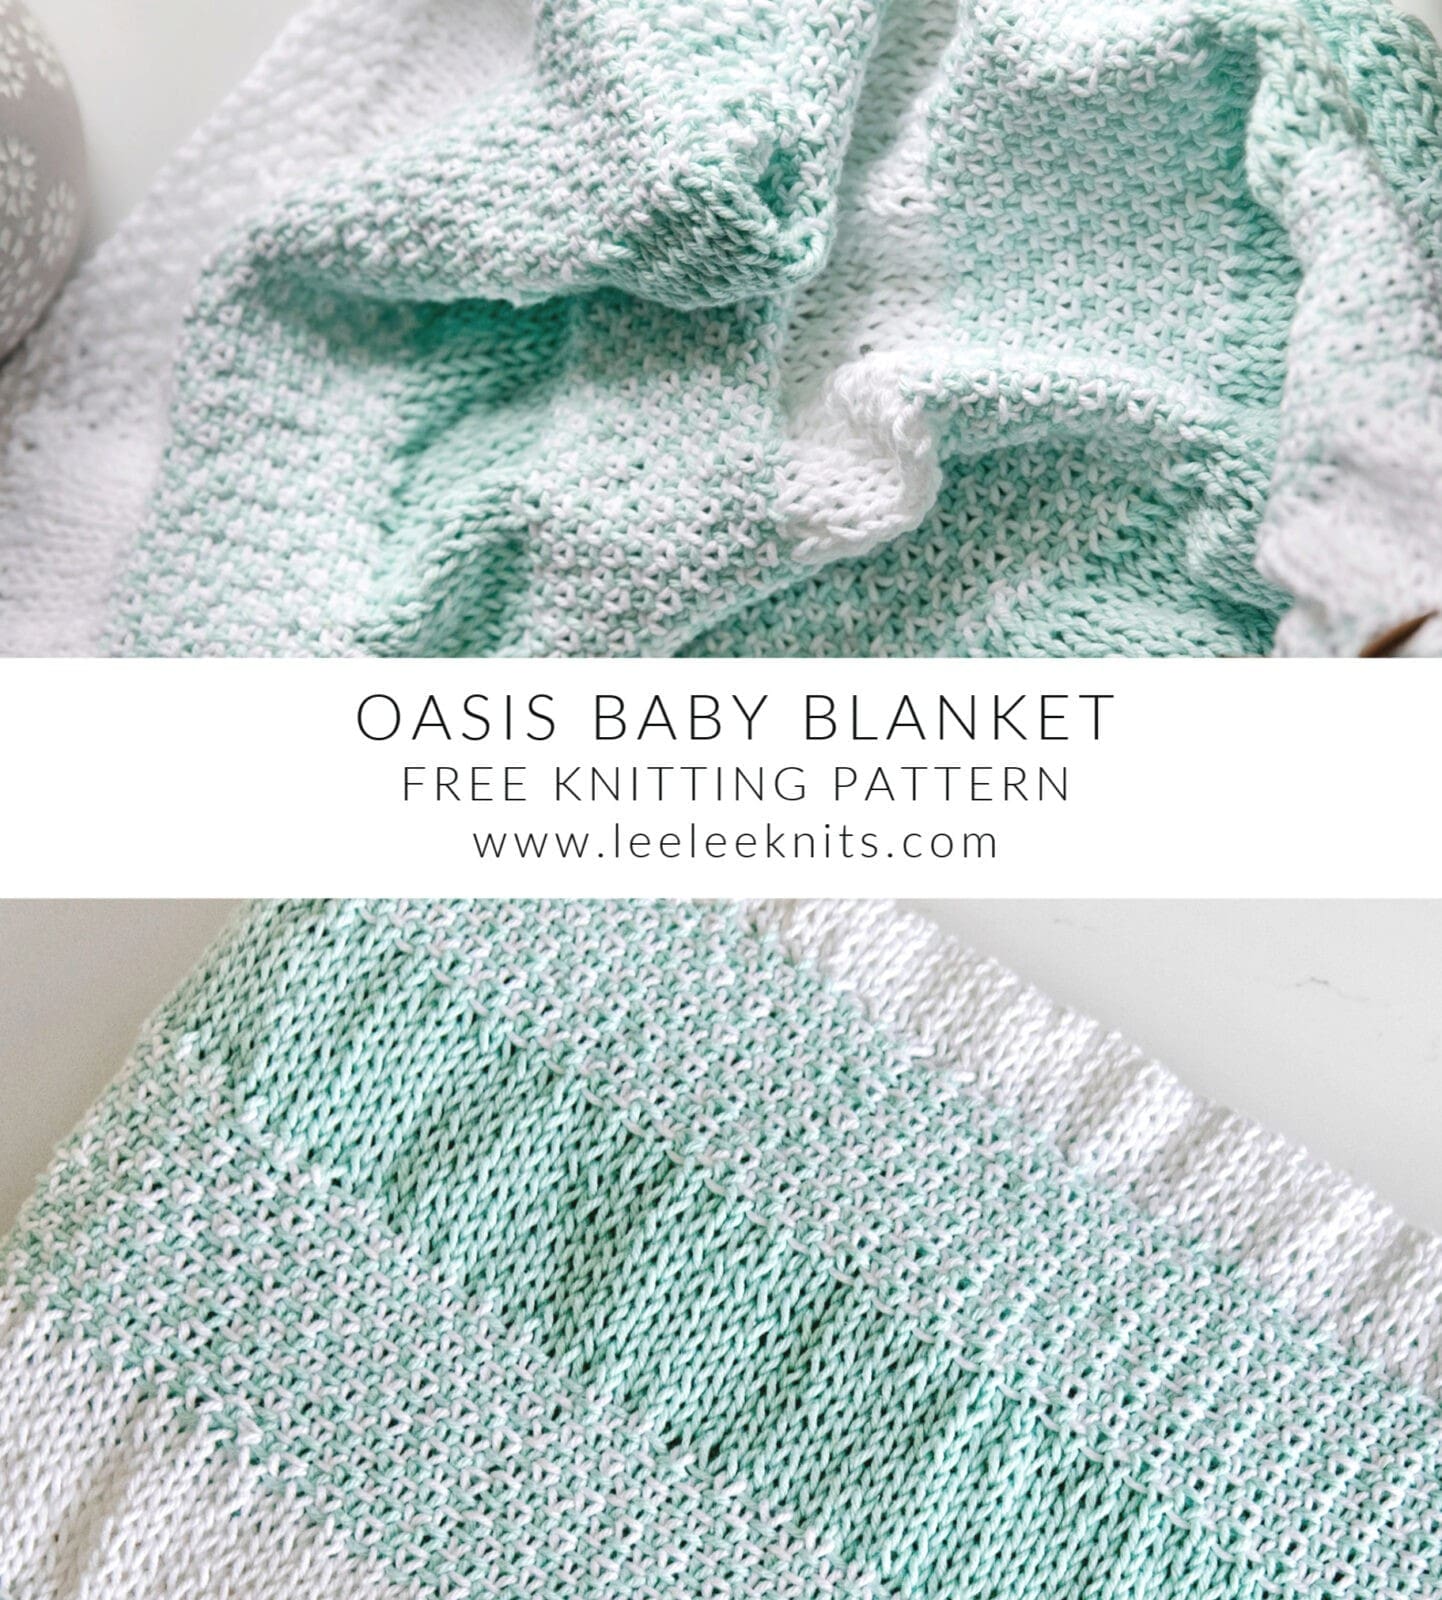
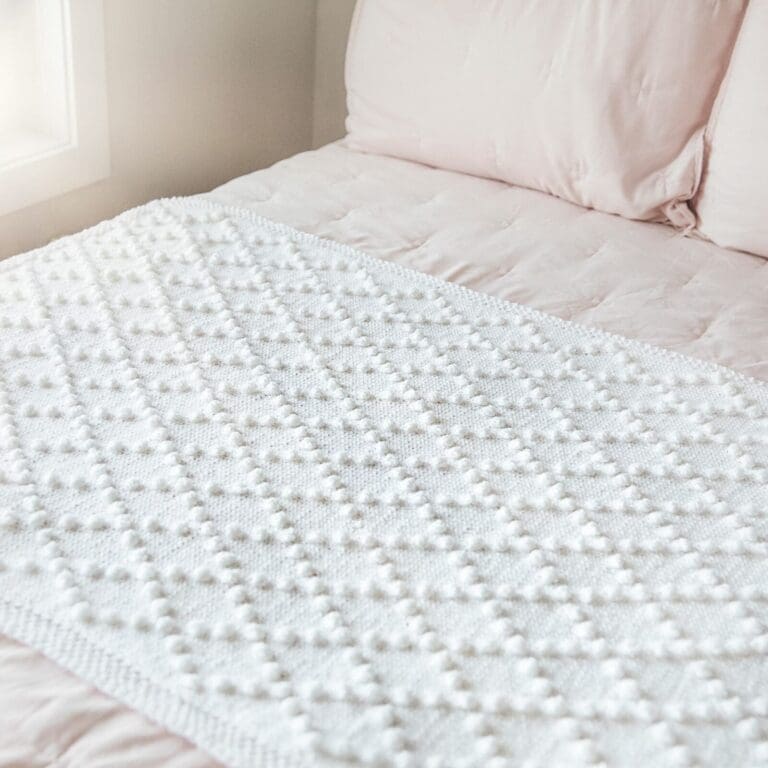
I have a brand new baby blanket pattern to share with you today! This airy baby blanket is perfect for the warmer months since it is knit with breathable cotton yarn. In knitting this blanket, you’ll also get to try out the knit linen stitch, which is a fun way to add a woven look to your knitting using two colours.
Pin It for Later!
I hope you enjoy this pattern! Please feel free to share the link to this page on your social media or Pinterest account.
I truly appreciate all of you who get the word out about this site and my patterns!
❤️ Alnaar
What Is The Knit Linen Stitch?
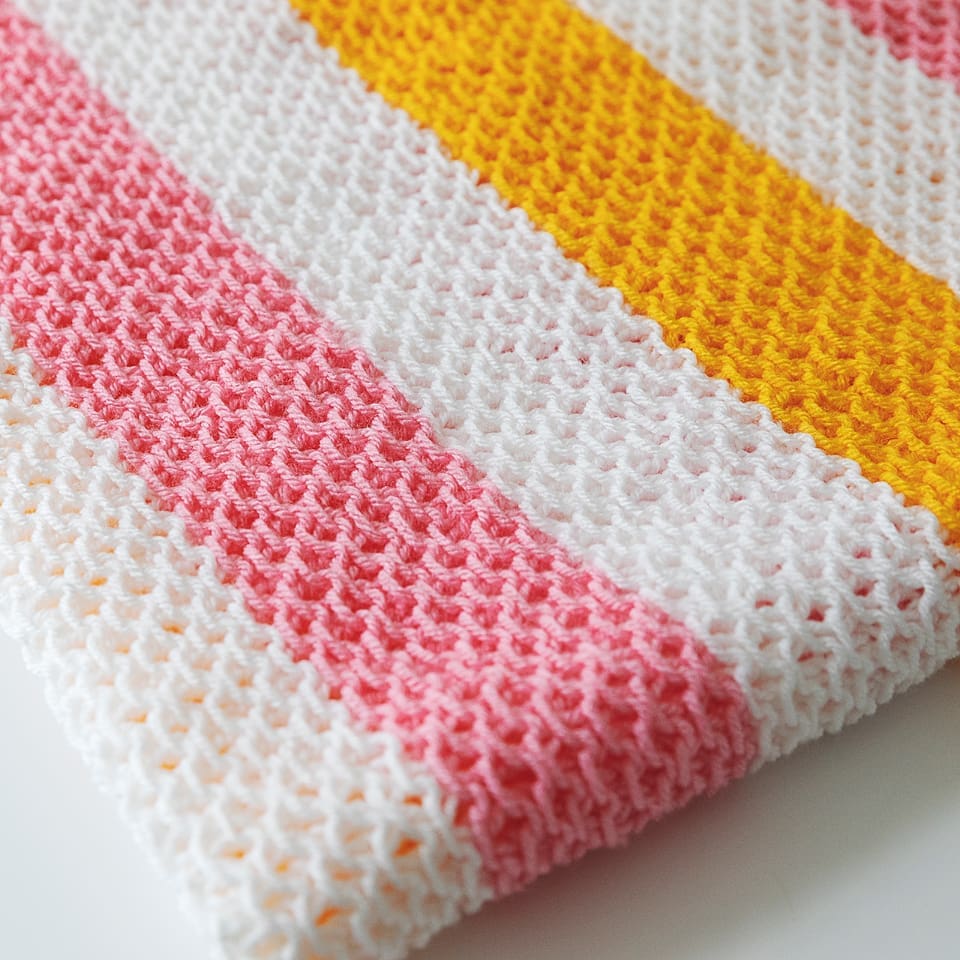
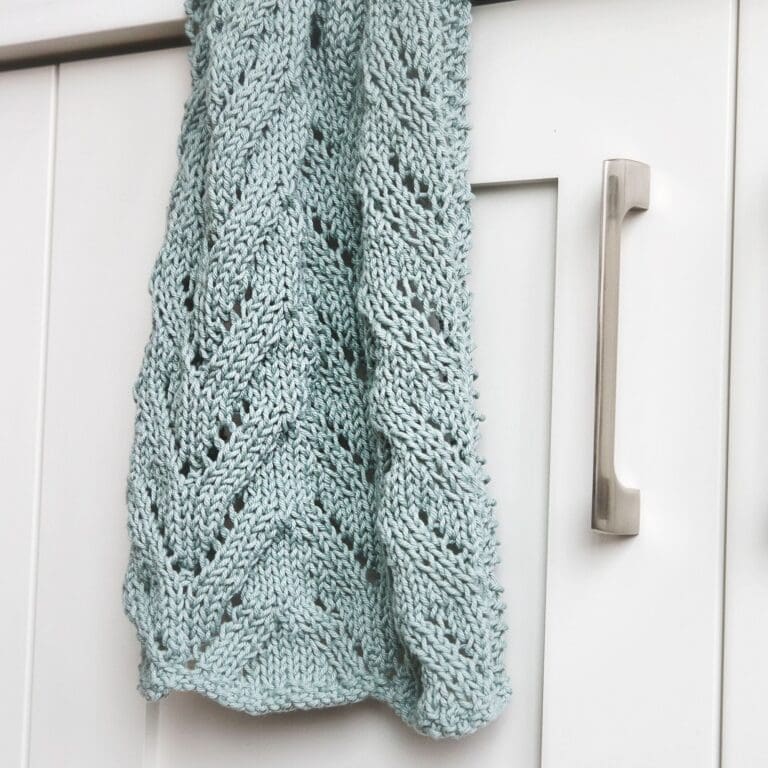
The linen stitch is a simple but beautiful knitting technique that creates a tightly woven, textured fabric! It’s made using a combination of knit stitches and slipped stitches, which give it a neat, grid-like look. Even though it looks intricate, the linen stitch is very easy once you get the rhythm down, and it’s perfect for projects like scarves, dishcloths, or anything that needs a little extra structure.
How to Knit The Linen Stitch
The Linen stitch is worked over an odd number of stitches and alternates two rows as follows:
On the knit (right side) rows: Work the border stitches. Then bring the yarn to the front, slip the next stitch purlwise, bring the yarn to the back again, and knit the next stitch – repeating this sequence across the row until you reach the border stitches on the other end.
On the purl (wrong side) rows: Work the border stitches. Then purl one, bring the yarn to the back, slip the next stitch purlwise, bring the yarn to the front again – repeating this sequence until you reach the border stitches on the other end.
This back-and-forth movement of the yarn creates horizontal bars across the slipped stitches, which gives the linen stitch its signature “woven” texture.
And, by changing colours after every two rows, you get the look of having two colours woven together!
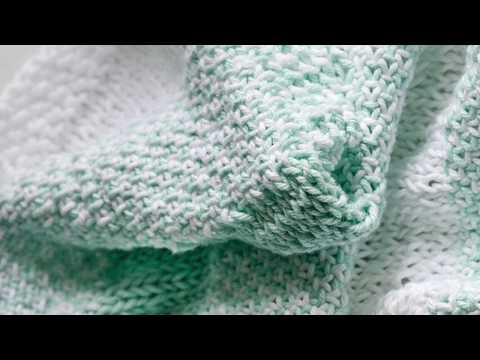
Video Tutorial
I know some of you may not have experience with knitting the linen stitch, which is why I created a video tutorial (which I’ve shared below with the pattern) demonstrating it on a small swatch. You can also check it out on the Leelee Knits YouTube channel at the follow link: Knit Linen Stitch Tutorial.
Tips For Knitting the Linen Stitch
You’ll notice with knitting this blanket that the linen stitch is tighter and denser than regular stockinette stitch. I recommend working the linen stitch rows looser than you normally would so that they don’t bunch in too much. Don’t worry if it still pulls in slightly as blocking will help even everything out in the end. I did not block the blanket in the photos because I like the rustic vibe, but if you want your blanket to look polished then you can definitely block it! If you’re not sure how to block your knitting, I wrote a post to explain the process with one of my knit baby blanket patterns: How to Block Knitting Projects.
One more thing to keep in mind: since the knit linen stitch is so dense, it takes more rows of linen stitch to reach the same length as stockinette. In this pattern, for example, each stockinette section is 10 rows, while the linen stitch sections are 22 rows to match the height.

Please note that some of the links on this page are affiliate links and I will earn a commission if you purchase through these links. I use all of the products listed on this page and recommend them because they are companies that I have found helpful and trustworthy. Please let me know if you have any questions about anything I have recommended!
Free Knit Linen Stitch Baby Blanket Pattern
Materials:
- Knit Picks Dishie Worsted Weight Cotton Yarn
- 3 Skeins White (Colour A).
- 3 Skeins Mint (Colour B).
- Size 7 US (4.5 mm) 32” circular knitting needles.
- Scissors.
- Yarn needle for weaving in ends.
Ad Free PDF File
The free knitting pattern for this blanket is available right here on this page, as this site is sustained through ad support.
I’ve also put together an ad-free, downloadable PDF version of the pattern. It’s perfect for easy printing and can be can be purchased through My Ravelry Store or by clicking the “Purchase PDF File” button to the right.
Thank you so much for your support! It means the world to me, and I’m beyond grateful to be able to share my passion with you all.
Size:
Finished blanket measures: 29” wide X 42” long.
Gauge:
5 rows, 4.5 stitches = 1 inch in stockinette stitch.
Abbreviations:
K: Knit.
P: Purl.
YF: Yarn Forward.
YB: Yarn Back,
SL: Slip Stitch from Left Hand Needle to Right Hand Needle.
Stitches – Knit Linen Stitch, Stockinette Stitch & Seed Stitch
There are three different stitches used to create this blanket:
Stockinette Stitch (includes 4 border stitches on each end):
Row 1: K1, P1, K1, P1; Knit to last 4 stitches; P1, K1, P1, K1.
Row 2: K1, P1, K1, P1; Purl to last 4 stitches; P1, K1, P1, K1.
Repeat above rows for stitch pattern.
Knit Linen Stitch (includes 4 border stitches on each end):
Row 1: K1, P1, K1, P1; *YF, SL1 purlwise, YB, K1; repeat from * to last 5 stitches; YF, SL1 purlwise, P1, K1, P1, K1.
Row 2: K1, P1, K1, P1; *P1, YB SL1 purlwise, YF; repeat from * to last 5 stitches; P2, K1, P1, K1;
Repeat above rows for stitch pattern.
Seed Stitch (used for top and bottom border of blanket):
Row 1: *K1, P1; repeat from * to last stitch, K1.
Repeat above row for stitch pattern.
I’ve create a video tutorial demonstrating the Linen Knit Stitch below as well. The video uses one knit stitch on each end instead of a seed stitch border like the blanket, so remember that the edge stitches will be different when you knit the actual blanket.
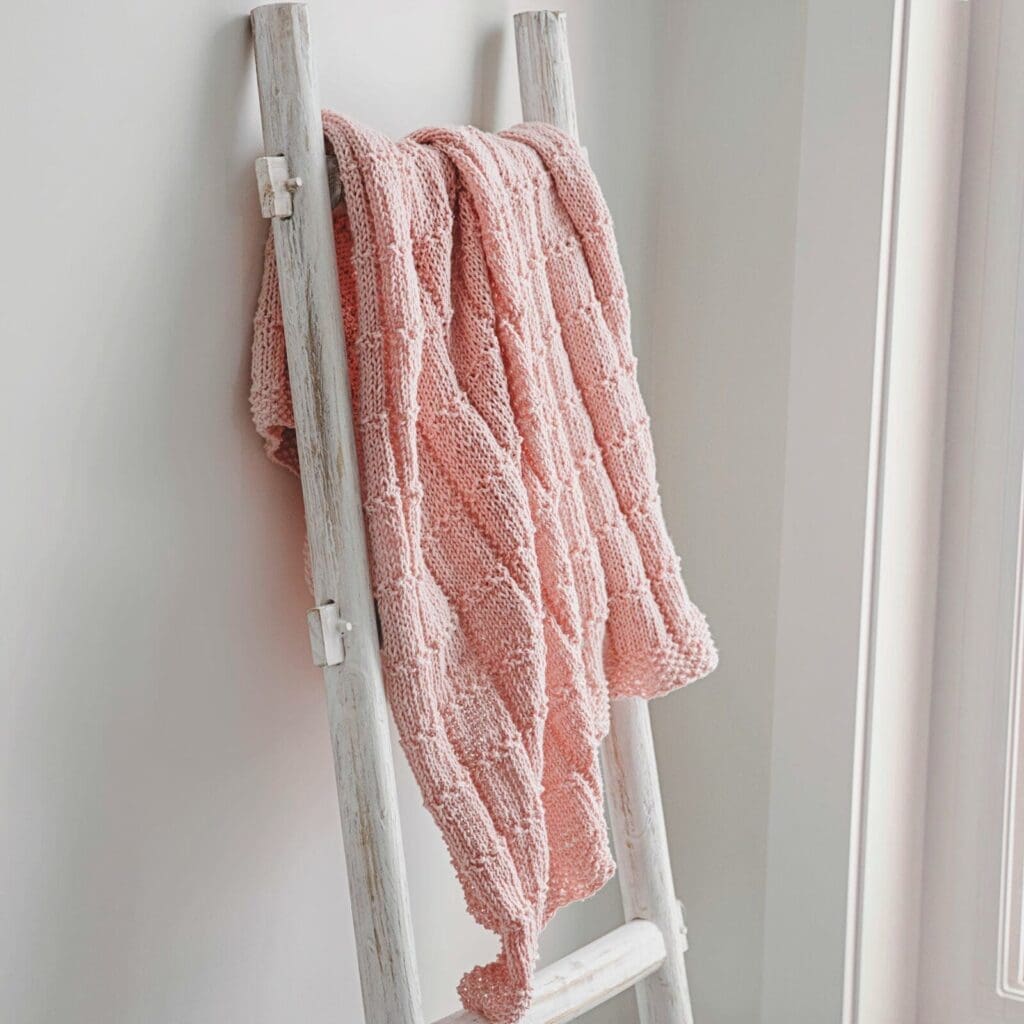
More Free Blanket Knitting Patterns from Leelee Knits!


Free Written Pattern:
This blanket is worked from the bottom up.
With Colour A, cast on 145 stitches (or an odd number plus 4 on each side for border if you’d like to change the width).
Work 6 rows in Seed Stitch for the bottom border.
Once you’ve worked the bottom border, complete the following steps 4 times in total:
- With Colour A, work 10 rows in Stockinette Stitch.
- Switch colours (do not cut the yarn for the previous colour) and work two rows of Linen Stitch. Repeat this step 11 times so that you’ve knit 22 rows in Linen Stitch. The last 2 rows will be with Colour A.
- Cut yarn for Colour A.
- With Colour B, work 10 rows in Stockinette Stitch.
- Switch colours (do not cut the yarn for the previous colour) and work two rows of Linen Stitch. Repeat this step 11 times so that you’ve knit 22 rows in Linen Stitch. The last 2 rows will be with Colour B.
- Cut yarn for Colour B.
After you’ve repeated the above steps 4 times, work 10 more rows with Colour A in Stockinette Stitch for symmetry. Then work 6 rows in Seed Stitch for the top border.
Finally, cast off in pattern and weave in all loose ends. You can block this blanket since the knit linen stitch rows bunch in a bit or leave it as is for a rustic look.
Pattern PDF File
I hope you enjoyed learning the knit linen stitch and knitting this baby blanket.
If you’d like your own copy of the pattern, the Ad-Free PDF file (which will be emailed to you automatically) can be purchased through Ravelry, or by clicking the “Purchase PDF File” button to the right.
Thank you so much for your support! It means the world to me, and I’m beyond grateful to be able to share my passion with you all.


Question-Is this blanket completely reversible?
Hi Sheila, the back is different for the stockinette stitch part (purls on the back), but it still looks great!
This is very beautiful,and I have the cotton thread called for in my yarn stash, you are right,it must be matching thread to come out correct.my question is,does it need blocking when completed,sometimes the cotton thread may give just a very tiny bit(depending on how it is knit).thank you for a beautiful pattern, I’m looking forward to your next project.
You’re welcome Jen! I didn’t block it, but if you are looking for a more polished look then it would be a good idea to block since the stitches are looser for the stockinette stitch compared to the woven stitch.
Another Beautiful Blanket Design And Released The Ame Day My New Grandson Was Born Is An Added Bous Beautiful Thanks
Yay! Congratulations Shazz!
Thank you for such a gorgeous pattern. You knitting is beautiful and your
colours work so well. You are a star.
Lynn
Awe, you made my day! Thank you Lynn
I’m fairly new to knitting. Am expecting our first grandchild this summer. Do you recommend this blanket? It is so pretty
Hi Bari, if you are new to knitting then I would recommend a pattern that only uses knits and purls. This one may be a bit too advanced for an absolute beginner.
I purchased your oasis baby blanket from Knit Picks and I have a question.
The pattern says to work two rows of Woven Stitch to create the pattern.
It does not tell how many times to repeat the woven pattern for this blanket.
By looking at the pictures it is a lot more than 2 rows.
Hi Adelia, Thanks for your question! The 2 rows of woven stitch are repeated 11 times, so there are actually a total of 22 rows of the woven stitch.
“Repeat 11 times (total of 22 rows):
Switch colours (do not cut yarn for previous colour) and work two rows of Woven Stitch.”
Hi Adelia,
I am knitting up this pretty blanket but am finding myself confused as to the Pattern .
I knitted the 6 rows of Seed Stitch .
Next , I knitted 10 rows of Stcokinette stitch .
Now, as I look at the picture of the blanket, it appears that I begin the woven stitch section for 10 rows ?
I am not understanding the repeat 11 times for 22 rows.
Could you perhaps explain it in a different way than the instructions ? I love the blanket and really want it to knit up.
Is it a sequence of 10 rows of each style stitch ?
Sorry to be so long winded and I appreciate any assistance !
Hi Irene,
The woven stitch unfolds over two rows, and what you’ll do is repeat these two rows a total of 11 times, giving you 22 rows in all.
Start by working two rows of the woven stitch in colour A, then switch to colour B for the next two rows. Continue alternating between colors A and B until you’ve crafted 22 rows of woven stitch.
This stitch is more tightly packed than stockinette, which is why the woven row section is 22 rows instead of 10 rows.
Hope this helps!
❤️ Alnaar
I mistakenly typed Amelia’s name when messaging you . I meant to address leelee knits . So sorry …
Irene
I love this blanket. Knitted it up exactly like yours two years ago and gave it away. My niece has now had 4th child and still loves the blanket. I want to knit it again. Thank you.
You’re welcome Lane! 💖