Search

Crochet Shell Stitch Baby Blanket Pattern

crochet shell stitch baby blanket

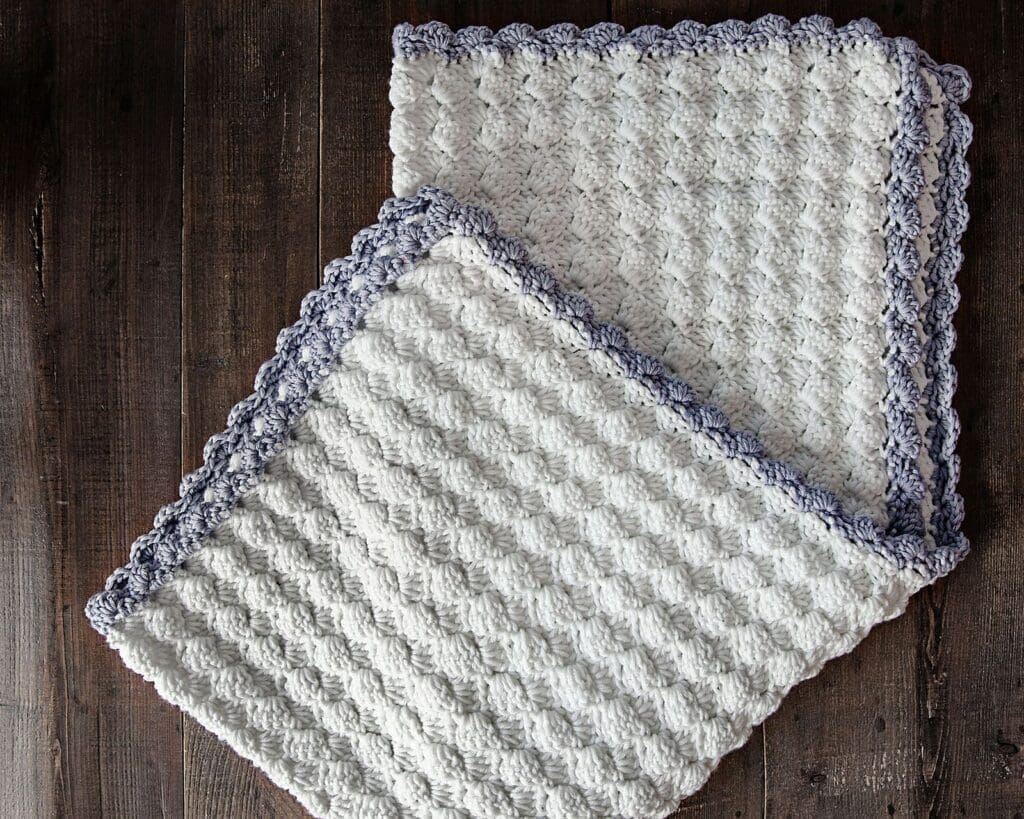
For my first post of the year, I’m sharing a crochet shell stitch baby blanket! The Vintage Chic blanket is the quintessential baby blanket with a ruffled crochet border.   The pattern is easy enough for beginner crocheters, but still a fun project for those of you who have been crocheting for years and enjoy shell stitches.

Baby blankets are so much fun to make.  Because there is no shaping required, you can just work the pattern stitches and daydream or zone out.  For me, crocheting a blanket puts me in a similar state to meditating.  If I’m feeling stressed out one of the best ways to calm myself down is to work an easy, repetitive stitch for half an hour.

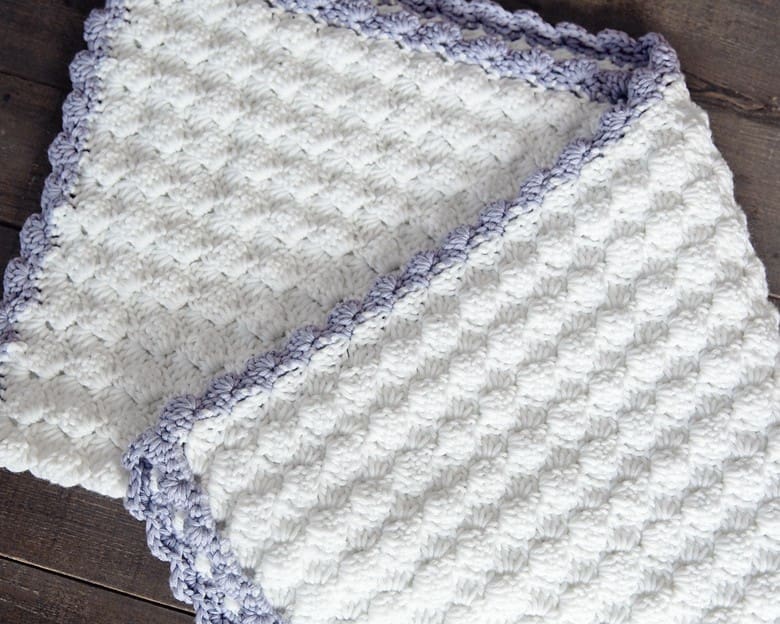
Since the blanket that I made for this post is very feminine, I would suggest using blue or green edging for a baby boy.  Also, if you find the edging too feminine, a few rounds of single crochet would definitely be a great alternative border.

Scroll down to see the Vintage Chic Classic Baby Blanket crochet pattern. The ad-free instant download PDF file can be purchased for easy printing and reading through Ravelry, or by clicking the button below.


crochet shell stitch baby blanket

Please note that some of the links on this page are affiliate links and I will earn a commission if you purchase through these links.  I use all of the products listed on this page and recommend them because they are companies that I have found helpful and trustworthy. Please let me know if you have any questions about anything I have recommended!

Crochet Shell Stitch Baby Blanket

What you will need

Here is what you will need to make this cozy shell stitch baby blanket:

Measurements

This baby blanket measures 24.5″ X 33″.


Looking for More?

A few more beginner friendly baby blanket patterns for you!


Special Stitches

Shell:  (1SC, CH2, 4DC) in same ch or stitch.

Shell Stitch Baby Blanket Crochet Pattern – Free

Using your main colour, chain 102.

Row 1:  Shell in 2nd ch from hook; *skip 3 ch, shell in next ch; repeat from * to last 4 ch; skip 3 ch, 1SC in last ch; CH3, turn.

Row 2:  2DC in first sc; *shell in next ch2 space; repeat from * to last ch2 space; 1SC in last ch2 space; CH3, turn.

Row 3:  2 DC in first sc; *shell in next ch2 space; repeat from * to turning chain space; 1 SC in turning chain space; CH3, turn.

Repeat row 3 until your work measures approximately 23 inches (or desired length).  At the end of the last row switch to your second colour, CH1, turn.

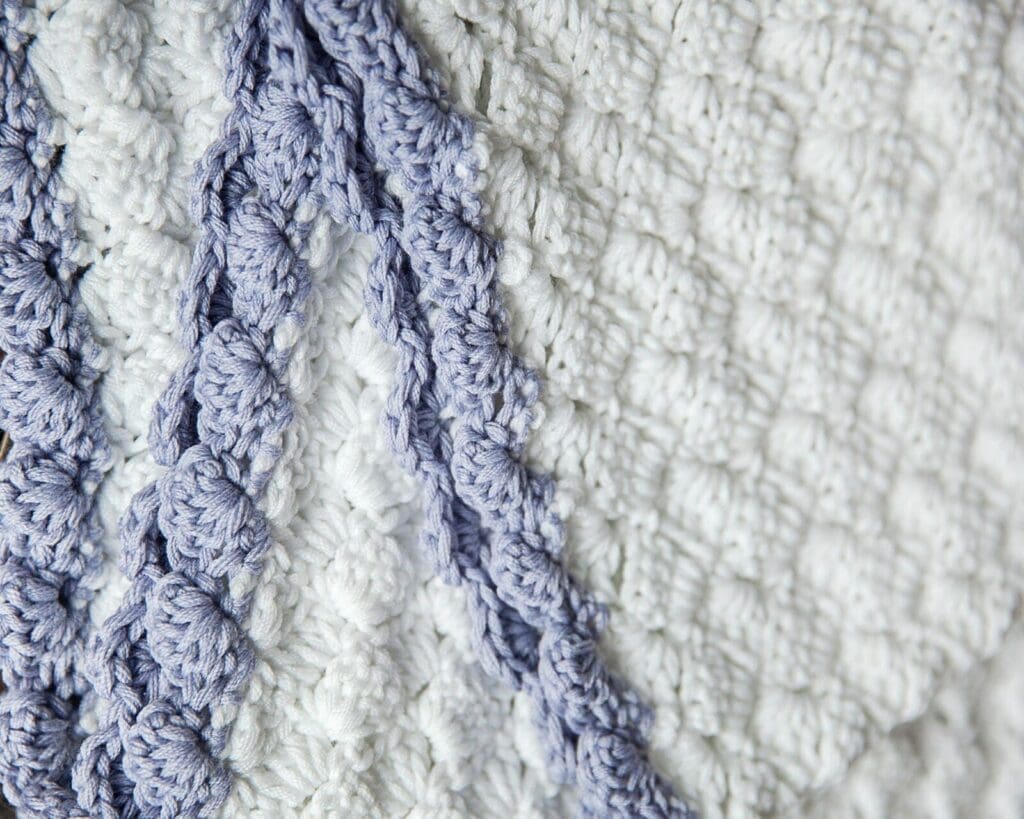
Crochet Shell Stitch Edging:

Round 1:  Crochet around the border of the blanket evenly in single crochet (work 3 SC in each corner stitch of the border to prevent the corners from curling inwards). Once you have completed one round, join to first sc with a slip stitch.

Note: The top of the blanket is a little bit confusing for the first round since there are shells and not a straight row to work off of.  To begin the top border: CH1 and switch to your new colour. Work 3SC in the first sc. After that, work 1SC in each dc (each shell represents 4 stitches so you want to make 4 SC per shell). You will know you are doing it correctly because the top will start to straighten out. Once you reach the end of the row, work 3 SC in the top of the turning chain and continue to work around the border in single crochet.

Round 2: CH2, work (3 DC, 1 SC) in same stitch; *skip 3 sc, work (4DC, 1 SC) in next sc; repeat from * all the way around the border of the blanket. Join to beginning of the round with a slip stitch.

Fasten off and weave in all loose ends.


I hope you enjoyed the Vintage Chic crochet shell stitch baby blanket pattern.

The Ad-Free PDF file (which will be emailed to you automatically) can be purchased for $5 USD through Ravelry, or by clicking the button below.


crochet shell stitch baby blanket
Looking for Something?
Search
Popular posts

55 Responses

  1. Hi

    I’m in England, in the rain ???? Is this pattern written in US stitches? I know they differ

    Beautiful blog by the way

    Alison x

    1. Hi
      Have worked out this is in US sizes, but I just can’t get it to work out for me ???? On the 2nd row do you always she’ll in the 2 chain spaces???
      Sorry

      1. Yes, I’m sorry there was a typo. I forgot to put the * before the repeat. I have updated row 2, so it is more clear now. Thanks for pointing it out!

  2. This pattern is so pretty! Just curious as to how you did the very last row? Do you do any single crochets and slip stitches into the middle of the shell and then start your border with the next color? I know you gave a link as to how to do a sc border first but the top would be different then the bottom. I’m rather new at crocheting so it could be me not understanding the pattern.

      1. Hello! I was going to ask the same question as Cierra 🙂 When you say complete a sc in each stich all the way around, could you elaborate for us newbies? As Cierra said, the top is very different to the bottom and sides as its sitting open ready for another row, so what is meant by “each stich” for the different sides is throwing me a little. I’m also keen not to ruin my work which it looking lovely, with a dodgy uneven edge! 🙂 Does the SC happen in the ch3 on the sides and bottom, and then the ch2 on the top? Or in every ch all the way along the outside? So sorry if this is a silly question—thanks in advance for your help! 🙂 PS: I’ve scoured the link you have kindly provided which is wonderful, but as a newbie I am struggling to apply it to the shell stich (especially the top row) as the step-by-step is for a more basic crochet piece. Thanks so so much!

        1. Hi Shelly,

          For the top row of the border, what you need to do is Ch1 and switch to your new colour. Then, you do 3 sc in the first sc. After that, do one sc in each dc only (each shell represents 4 stitches so you want to make 4 SC per shell). You will know you are doing it correctly because the top will start to straighten out. Once you reach the end of the row, do 3 SC in the top of the turning chain.

        2. I had the same exact problem. It took me two months to finish the edging as every time I picked it up I would get frustrated. I tried you tube but couldn’t apply it to this blanket. Finally, yesterday I picked it
          up again since I need it for a shower next weekend. I just started on the shell side and did a SC in every
          stitch. I made sure to count the stitches and spaced the same amount around each side. After I did the second row, it came out absolutely beautiful. No one knows but me that there a so many mistakes. I hope this helps you. The blanket was so easy and fun and then the edging was so difficult for me.

          1. Thanks Lucille for your feedback. I am going to update the instructions to make it more clear how to crochet the top border. I’m glad that it worked out for you in the end.

  3. I just finished the blanket and it came out absolutely beautiful. I’m about to start the edging. Could you please explain simply how close I should do the single crochet around. I really don’t want to ruin the blanket by not doing the edging right.

    1. Hi Lucille, I’m not sure what you mean by how close… I simply did a single crochet in each stitch all the way around. The pattern includes a link to an article that explains how to do a single crochet border too if you are unsure of how. Hope that helps!

      1. Could you please tell me where the link is that explains how to do the border. I’m starting it now and am stumped

  4. Thank you so much for sharing your beautiful blanket! I used Caron Simply Soft in white & soft pink. I am new to crochet and studied some similar border patterns for a few days. It’s precious! I think it is a perfect blanket for charity donations to hospitals for families when babies are born sleeping or in intensive care because it is soft, thick, and quick to make.

  5. I have a new grandchild on the way, and this looks like the perfect pattern. It says “comfort worsted weight”. Is that 4 ply yarn, or baby yarn at 3 ply. Thanks in advance for your reply

  6. Hi there,
    Thankyou for this beautiful pattern! Undortunately, Im stuck on the second row understanding the instruction: shell in next ch2 space. Im unsure of where the ch2 space is? Could you provide maybe a visual description or a bit more detail here? Thankyou, its just me not able to read a pattern properly.

    1. Hi Sarah, when you make a shell you do the following: (1SC, CH2, 4DC). The chain 2 space is referring to the CH2 in the shell of the previous row. Hope that makes sense.

      1. I am at the same place. After a few are done, It bumps up. I assume that is correct. I just want to make sure that it is correct to have it look like the Sydney opera house and have a hole that a finger could go through. The picture above looks solid so I am just making sure. Also, I assumed that the first sc (of the second row) is referring to the last thing you did in row one (other than chain 3). Love the look of this quilt! Just want to be sure I am doing it correctly.

        1. This blanket is quite solid, so you may be using a yarn that is not thick enough. You could go down a needle size to make it thicker or choose a slightly thicker yarn. The top row of this blanket will not be straight but when you work the border it will straighten out if you follow if the instructions in the post.
          Yes, you are correct. The first SC of the second row is referring to the last sc in the row below 🙂

  7. I crocheted this blanket. I used 4 skeins and I already have the finished size. Should I continue using the 5th skein to make it bigger . Maybe for a crib.I am not sure what size that should be. I used the H hook.

    1. Hi Rita, You can continue if you would like it to be bigger or just start to finish it off. You may just crochet less tightly than I do.

  8. Hi Leelee, thanks for sharing this beautiful blanket pattern! If I want to make to make it slightly bigger, a multiple of how many + ? thanks for your help!

  9. Hi Leelee, thanks for sharing this beautiful blanket pattern! If I want to make it slightly bigger, a multiple of how many + ? thanks for your help!

  10. Hi was wonder how to increase the size and how many chains there has to be? I was hoping to make it a little wider than 24.5″.

  11. I’d like to make this blanket in an adult size, and was wondering how many chains should I should do to start the afghan. Is it double the 102 or is there an amount of multiples + an additional amount?

  12. Hi, back again. First, thank you for sharing this pattern. I really love this blanket! It’s beautiful and should be perfect for our new little one. 🙂

    I’ve never made a border so I want to make sure I understand the pattern correctly. When I sc evenly around, I sc in each dc of every shell (4 sc per shell) and SKIP the ch2 spaces of every shell; is that correct?

    Thank you in advance for your help!

  13. Thank you so much for sharing this pattern. I’m about half way through and your pattern is so beautiful! I can’t wait to finish it. ❤

    1. I do for some patterns, but not for this one. Try the Cozy Clusters pattern- that one is pretty straight forward and there is a video tutorial for the stitch.

  14. Hi, I’m just getting ready to start this pattern for a co–workers baby shower. I realized that I bought DK (3) weight yarn that calls for a G (4mm) hook. What is the chain pattern for adjustments? Thank you!

    1. Hi there. Simply chain a multiple of 4 plus 2 until your chain is the length that you would like the width of the blanket to be.

  15. If I use a 3 Ply Weight yarn what it work OK my daughter-in-law wants a pastel yellow and they only come in 3 weight
    Thanks

  16. Hi,

    I will be crocheting a blanket for the first time. With this pattern is it ok to choose a multicolor yarn than a solid one? How will it come out in multicolor?

    Thanks for your help!

    1. I think it would look nice with a multicoloured yarn. Just be sure that it is the same weight/thickness as the yarn listed in the materials.

  17. I just finished my second baby Afghan in this pattern and they are both very beautiful. They turned out great, but the instructions for round two of the border needs a few more details. The first side, the top, you made clear, but not the two sides and bottom for the single crochet row. I started the second edging row last night, but my shell doesn’t line up with the shells of the body as they did on my first one. I will be able to figure out how to get lined up, but if you could clarify what to do at the corners and sides and bottom, if not in the written instructions, a photo showing those two areas might make it easier for us to complete the edging.

  18. Yes, after you get more done it will look better and that bump you describe turns into the beautiful texture of this afghan…

  19. I haven’t crocheted in many years but hope to retire soon and have time to make this beautiful Vintage baby blanket as well as the Chevron for my grandson. Thank you for sharing patterns that are both beautiful and simple enough for beginners.

    Donnie

Leave a Reply

Your email address will not be published. Required fields are marked *