Baby Blanket Knit Pattern – Free & Beginner Friendly

If you’ve been searching for a baby blanket knit pattern that’s both beautiful and easy, you’re in the right place! I designed this soft, lightweight blanket to be knit entirely with simple knits and purls, making it a fun project for all knitters! The simple square texture adds just enough visual interest without requiring any fancy techniques or complicated stitch combinations too.
When I designed this pattern, I wanted to create something with a modern yet classic texture without any complicated stitches, so it would be easy for most knitters to tackle. By alternating blocks of knit and purl stitches, you’ll build a timeless texture that looks polished and modern. The pattern is also pretty easy to memorize. Once you find your rhythm, you’ll be cruising along. And before you know it, you’ll have a beautiful handmade baby gift ready to wrap!
Pin it for Later!
I hope you enjoy this pattern! If so, please feel free to share the link to this page on your social media or Pinterest account.
I truly appreciate all of you who get the word out about this site and my patterns!
❤️
Alnaar
My Yarn Choice for this Knit Baby Blanket Pattern
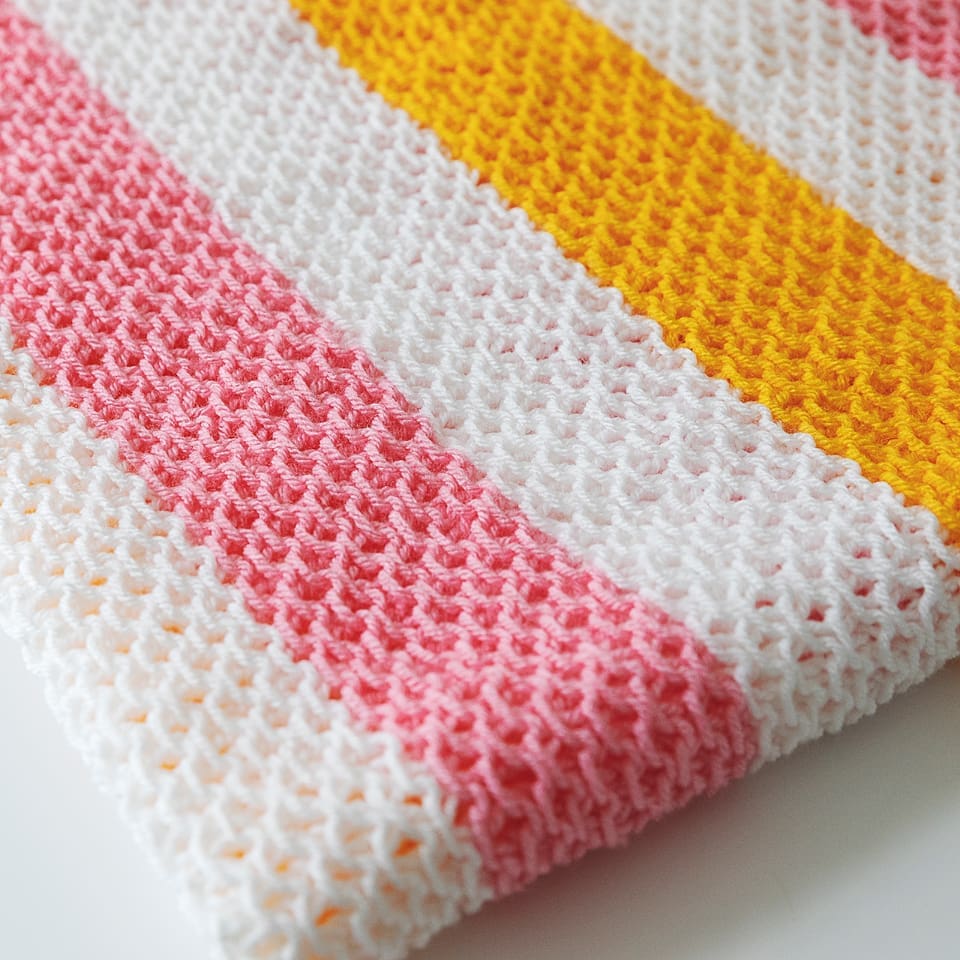
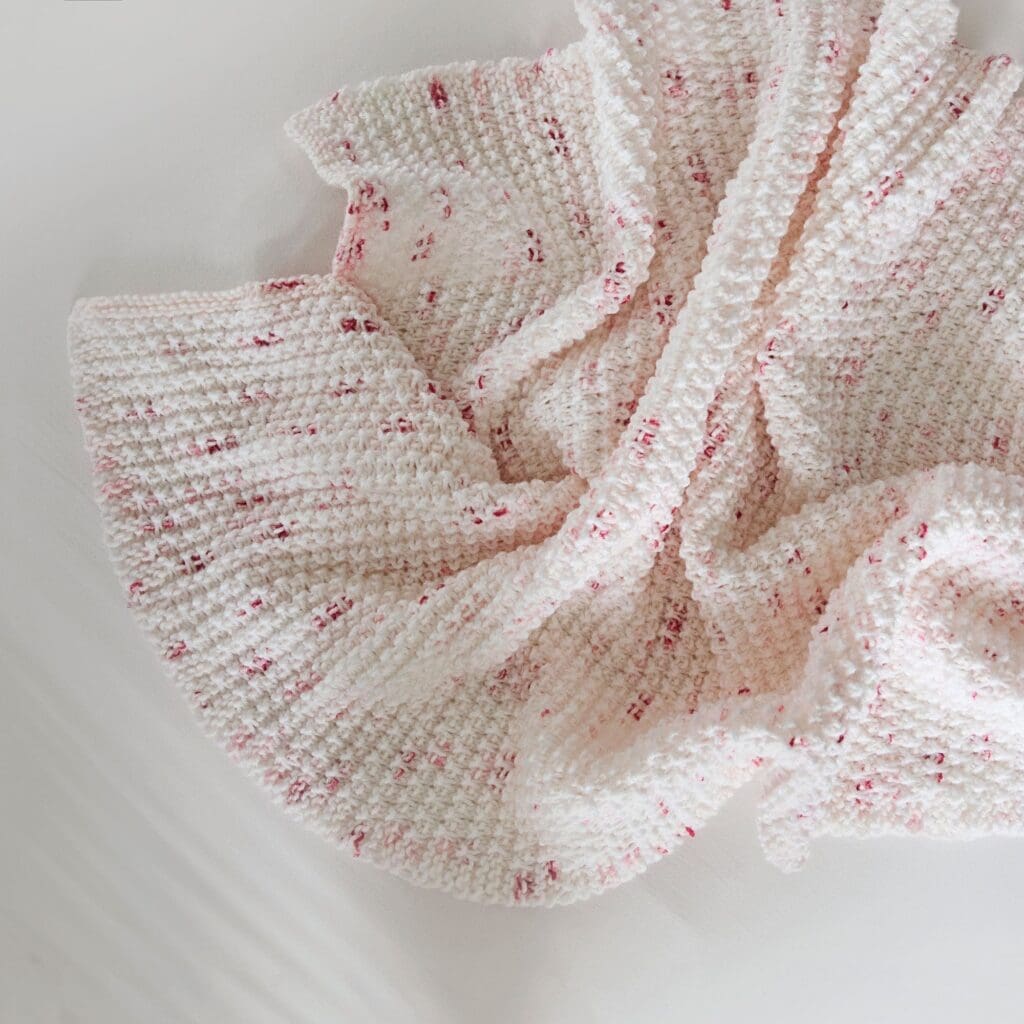
I made this baby blanket pattern for Knit Picks CotLin DK weight yarn, and was so happy with how it turned out! I don’t usually use such lightweight yarns for knitting blankets, but it really didn’t take much time to build and has such a beautiful drape that you just don’t get with worsted weight yarns. CotLin is a blend of linen and cotton, which means it’s light and breathable. This makes it a great choice for summer knitting, when it’s way too hot to have a heavy project in your lap. I also love that it has a nice, soft texture, but still holds the stitch definition really well so that the little knit and purl sections stand out.


Please note that some of the links on this page are affiliate links and I will earn a commission if you purchase through these links. I use all of the products listed on this page and recommend them because they are companies that I have found helpful and trustworthy. Please let me know if you have any questions about anything I have recommended!
Free Hope Baby Blanket Knit Pattern
What You’ll Need:
To knit this baby blanket, you will need the following materials:
- US Size 4 / 3.5 mm straight (14”) or circular (32”) knitting needles.
- 6 Skeins (738 yards) of Knit Picks CotLin DK weight yarn in Flamingo.
- Scissors.
- Tapestry/Yarn needle to weave in ends.
Ad Free PDF File
The free pattern for this knit baby blanket is available right here on this page, as this site is sustained through ad support.
If you like things a little more streamlined, I’ve put together an ad-free, downloadable PDF version of the pattern. It’s perfect for easy printing and can be can be purchased through My Ravelry Store or by clicking the “Purchase PDF File” button to the right.
Thank you so much for your support! It means the world to me, and I’m beyond grateful to be able to share my passion with you all.
Finished Knit Blanket Size:
Finished blanket measures 28″ wide X 34″ long.
Gauge:
5 stitches, 5.5 rows = 1 Inch in stockinette stitch.
Pattern Abbreviations:
K: Knit.
P: Purl.
More Free Baby Blanket Knitting Patterns from Leelee Knits!
Free Written Pattern:
Cast on 140 stitches (or a multiple of 20 plus 8, plus 12 for border). Continue to Bottom Border.
Bottom Border:
Row 1: *K1, P1; repeat from * to end of row.
Row 2: *P1, K1; repeat from * to end of row.
Repeat rows 1 and 2 three more times (total of 8 rows) to create a seed stitch pattern for the bottom border. Continue to Body of Blanket.
Body of Blanket:
Rows 1, 3, 5, 7, and 9: K1, P1, K1, P1, K1, P1; *K9, P1, repeat from * to last 14 stitches; K9, P1, K1, P1, K1, P1.
Rows 2, 4, 6, 8, and 10: P1, K1, P1, K1, P1, K1, *P9; K1, repeat from * to last 14 stitches; P9, K1, P1, K1, P1, K1.
Row 11: *K1, P1; repeat from * to end of row.
Row 12: *P1, K1; repeat from * to end of row.
Repeat rows 1-12 until blanket measures just under 33 inches. Continue to Top Border.
Row 1: *K1, P1; repeat from * to end of row.
Top Border:
Row 2: *P1, K1; repeat from * to end of row.
Repeat rows 1 and 2, two more times (there will be a total of 8 rows since rows 11 and 12 from body of blanket are in seed stitch) to create a seed stitch pattern for the top border. Continue to Finishing.
Finishing:
Cast off and weave in ends. You can wet or steam block the blanket too for professional results!
Permission To Sell Finished Items: You have my permission to sell any items that you make with my patterns. I kindly request that you credit Leelee Knits and link back to the Leelee Knits website when selling your work online. As well, please use your own images of the actual items that you make.
Pattern PDF File
I hope you enjoyed the free knitting pattern for this baby blanket.
If you’d like your own copy, the Ad-Free PDF file (which will be emailed to you automatically) can be purchased through Ravelry, or by clicking the “Purchase PDF File” button to the right.
Thank you so much for your support! It means the world to me, and I’m beyond grateful to be able to share my passion with you all.

Love your patters!
Thank you!
Thank you!
Thank you for the Hope Baby Blanket pattern. It will be a reminder of the year 2020 the year of COVID! We have had 5 babies born to friends during this time and Im sure they will love their little “Hope” blankies. As I sit and knit at home , Im reminded how blessed we are.
You are most welcome Sharon! We sure are. It seems like this year is bringing up all of the issues humanity is struggling with! Hopefully it will bring about change in how we live our lives.
This is a sweet blanket…which method do you use for adding a new ball of yarn. I find cotton yarns really show the area where you add the new ball. I love the look of the yarn (cotton & linen) that you used. Thanks for any tips!
I agree. I try to join only at the beginning of a row and pull the knot pretty tight – seems to work pretty well!
Your creations are lovely, and so is your website. I admire your generous spirit.
Thank you so much for your kind words Bonnie! I’m so happy to hear that you enjoy the patterns 🙂
Hi there,
What a beautiful blanket. I’m a beginner knitter but thought I’d give this a try. Could you suggest an option for a light wool? I’m finding it hard to locate the wool you suggest in my area and don’t want to pay the $ difference and taxes to have it shipped to Canada.
regards,
Sheila
Hi Sheila! I also live in Canada and order from Knit Picks since they have free shipping if you spend a certain amount – I think its $50 or $75. I highly recommend going with the yarn that I recommend if you want the blanket to have the same look and drape to it. If you would still prefer to shop locally for your yarn, look for a yarn that is the same weight (dk weight), and that is soft to the touch since the blanket is for a baby 🙂
Hi, thank you. I ordered the wool as your suggested and have just completed the blanket and am about to cast off. It is truly beautiful! I even ordered the same colour, such a pretty, soft pink. Thank you for your response!
Did you use the long-tail cast on method for this project?
Yes, long tail cast on is my go to method of casting on.
Perfect, done!
While reading this pattern the Hope baby blanket i got highly confused but as i read it over two or three times i think i understand it. Please correct me if still wrong.
It starts at the bottom border, then work the body of blanket and lastly the top border??? Its very simple as i have made one of ur blankets before but i was confused at first reading. thanks for making blankets so simple and easy. I am so what advance beginner or less. Great works.
Hi Beverly, yes you got it!
Made this blanket to give as a baby shower gift. I used the yarn suggested in the color Penneyroyal. It got lots of compliments from shower guest and the mom-to-be loved it. Thank you for the pattern.
You’re most welcome Sally!
Can you please advise as to where you would place stitch markers on both RS and WS of the blanket? For such a seemingly simple pattern, I have struggled with the repeats and the different amount of border stitches. I purchased the pattern and your blanket is beautiful. Any stitch marker placement advice would be greatly appreciated! 🙂
Hi Nancy, You could place markers as follows: After the first 6 border stitches, and then before the last 14 stitches and again before the last 6 border stitches. The pattern can also be read as follows:
Rows 1, 3, 5, 7, and 9: K1, P1, K1, P1, K1, P1; *K9, P1, repeat from * to last 14 stitches; K8, K1, P1, K1, P1, K1, P1.
Rows 2, 4, 6, 8, and 10: P1, K1, P1, K1, P1, K1, *P9; K1, repeat from * to last 14 stitches; P8, P1, K1, P1, K1, P1, K1.
Row 11: *K1, P1; repeat from * to end of row.
Row 12: *P1, K1; repeat from * to end of row.
I’m just starting to knit this sweet blanket for my first granddaughter. After having 5 sons,1 grandson (whom I all love to bits), I’m knitting this in pink.
My question is do you slip the first stitch of each row to make a nice edge? My mom always did that and I’m wondering if I should do that here.
Great question Evelyn! Yes, you totally can slip the first stitch to make the edge tidier. Enjoy the pattern and congrats on your new granddaughter! 💖