Free Crochet Bunny Pattern!
Cute Bunny Rabbit Crochet Pattern!
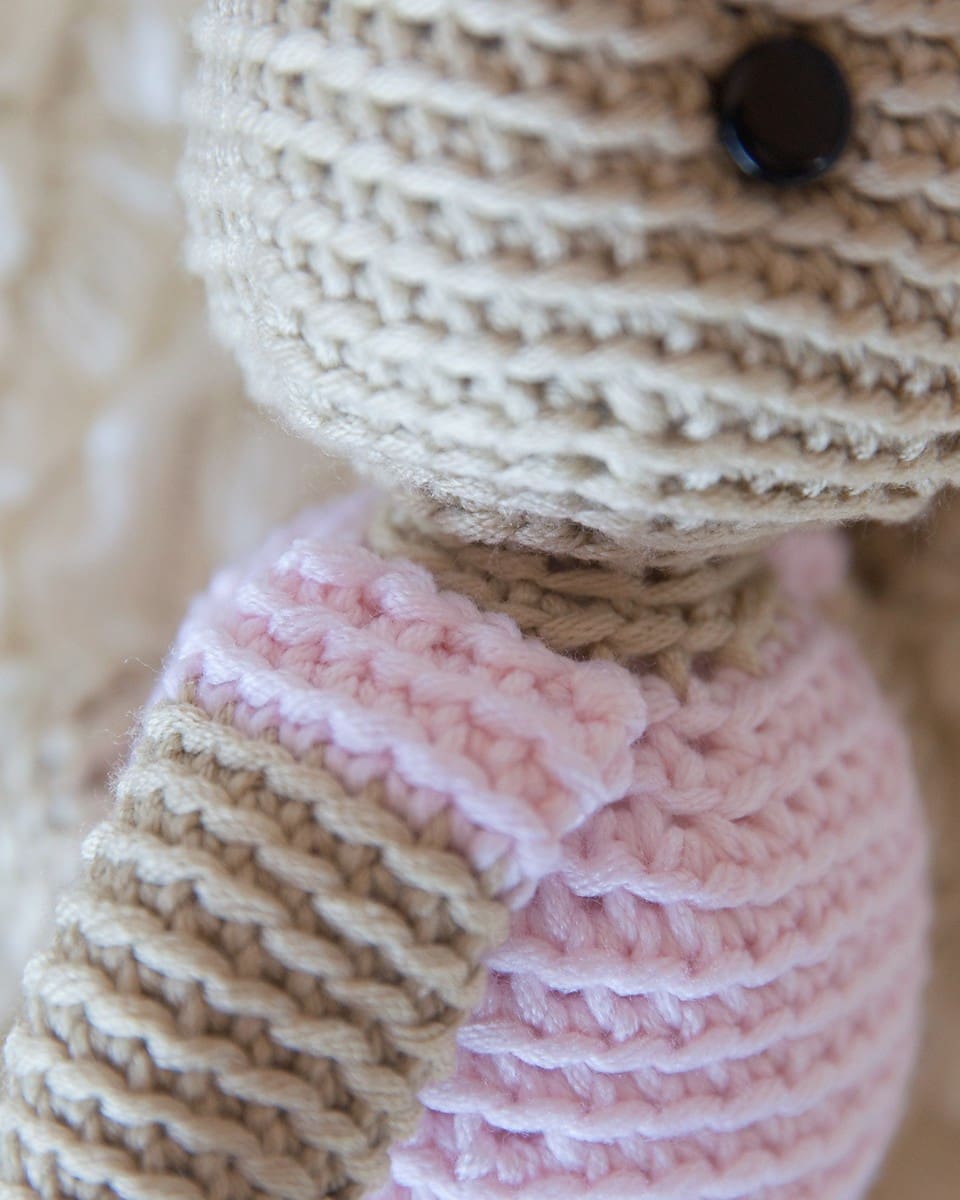
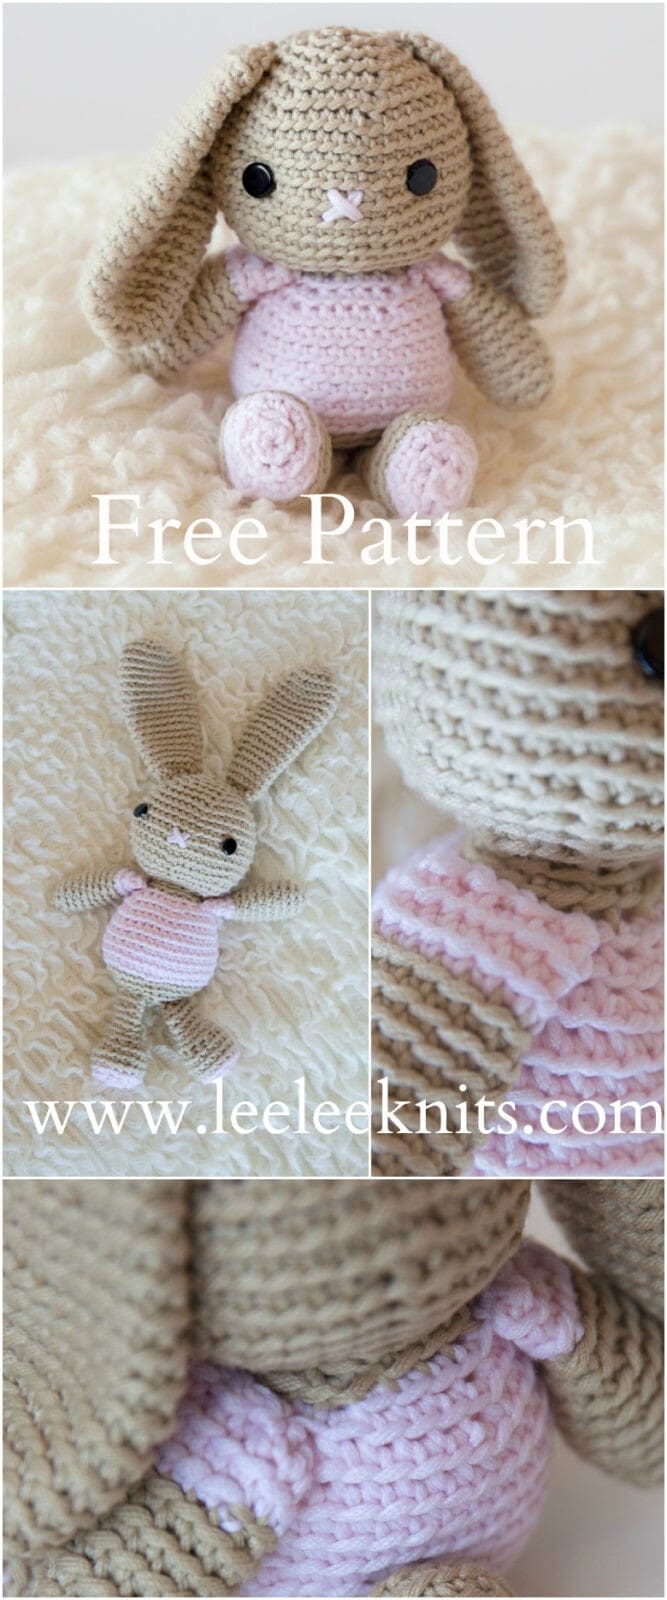
I have the cutest free crochet bunny pattern to share with you today! This little bunny rabbit was inspired by a very important design request from my daughter. She wanted a special stuffed animal to keep in her backpack for school. Something soft to hold when she’s missing home… and obviously something cute enough to show off to her friends too! She’s a girly girl and her favorite color is pink, so I came up with a floppy-eared bunny wearing a pink t-shirt.
Save This Pattern!
I hope you enjoy this crochet pattern! If so, please feel free to share the link to this page on your social media or Pinterest account.
I truly appreciate all of you who get the word out about this site and my patterns!
❤️ Alnaar
Crocheting Your Bunny
This bunny is crocheted from the top down, starting with the head and body as one piece. Then you’ll crochet the ears, tail, arms, and legs separately and sew them on. I’ve included lots of photos and notes for each step to make things as simple as possible!
I used Berroco Comfort worsted weight yarn in “Barley” and “Pretty Pink” for the bunny in these photos. I love this yarn for crocheting stuffed animals because of how soft and durable it is. Feel free to use whichever worsted weight yarn that you like for your bunny, but if you want to try out Berroco Comfort, I highly recommend it!
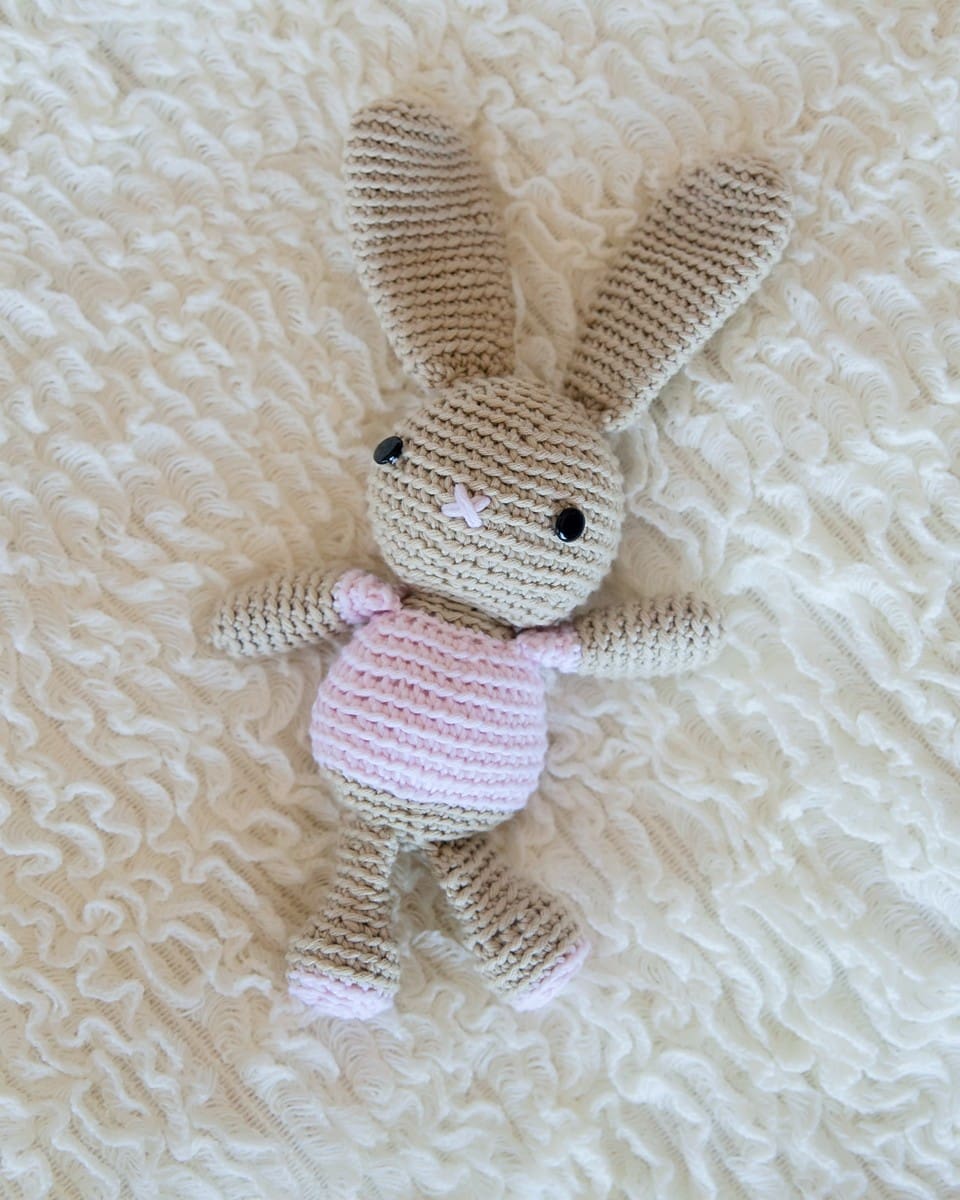
The finished bunny measures about 9 inches tall with the legs stretched out, or around 6 inches sitting. So, it is the perfect size for little hands, Easter baskets, or just hanging out on your desk looking adorable.
To give your bunny its squishy, huggable shape, you’ll need some polyester fiberfill (also known as Poly-Fil), which you can find at any craft store (I’ve also seen it on amazon). Just a small handful will do for this project. Enough to fill the body and limbs so your bunny holds its shape without looking like it hit leg day too hard. You can also use yarn scraps in a pinch, but polyfil gives the softest, most even finish.
Please note that some of the links on this page are affiliate links, which means that I will earn a commission if you purchase through these links. I use all of the products listed on this page and recommend them because they are companies that I have found helpful and trustworthy. Please let me know if you have any questions about anything I have recommended!
Free Crochet Bunny Pattern
What you will need:
Here is what you will need to crochet your bunny:
- Berroco Comfort Worsted Weight Yarn in two colours. I used:
- Color A: Barley (approx. 120 yards).
- Color B: Pretty Pink (approx. 50 yards) .
- Size G (4.0 mm) Crochet Hook.
- Safety Eyes or buttons (if you are making this for a very small child it is safest to embroider on the eyes).
- Scissors.
- Stitch Marker or scrap piece of yarn.
- Poly-Fil for stuffing the bunny.
- Yarn or tapestry needle to sew the pieces together.
Ad Free PDF File
The free pattern for this bunny is available right here on this page, as this site is sustained through ad support.
If you like things a little more streamlined, I’ve put together an ad-free, downloadable PDF version of the pattern. It’s perfect for easy printing and can be can be purchased through My Ravelry Store or by clicking the “Purchase PDF File” button to the right.
Thank you so much for your support! It means the world to me, and I’m beyond grateful to be able to share my passion with you all.
Finished Bunny Size:
The finished bunny rabbit will measure approximately 9 inches tall with legs extended (6 inches sitting).
Crochet Bunny Pattern Abbreviations:
SC: Single Crochet.
ST: Stitch.
SC2Tog: Single Crochet Two Together.
Notes Before you Start This Free Crochet Bunny Pattern:
- I worked my single crochets in the back loop to make it easier to count my rows and because I like the way it looks.
- Work your rounds in spirals and do not join at the beginning of each round. You will need to use a stitch marker to mark your rounds.
- Each round has the total number of stitches for the round in brackets. If you are unsure its always a good idea to count your stitches.
More Free Crochet Toy Patterns from Leelee Knits!
Free Crochet Bunny Pattern:
Begin by Crocheting the Bunny’s Head and Body:
Crochet the Head as Follows:
With colour A, make a magic circle or adjustable ring
Round 1: Make 6 SC in magic circle (6 St).
Round 2: SC twice in each stitch (12 St).
Round 3: *SC twice in next stitch, SC in next stitch. Repeat from * until end of round (18 St).
Round 4: *SC twice in next stitch, SC in next 2 stitches. Repeat from * until end of round (24 St).
Round 5: *SC twice in next stitch, SC in next 3 stitches. Repeat from * until end of round (30 St).
Round 6: *SC twice in next stitch, SC in next 4 stitches. Repeat from * until end of round (36 St).
Round 7: *SC twice in next stitch, SC in next 5 stitches. Repeat from * until end of round (42 St).
Rounds 8-10: SC in each stitch (42 St).
Round 11: SC twice in next stitch, SC in next 20 stitches, SC twice in next stitch, SC to end of round (44 St).
Round 12-13: SC in each stitch (44 St).
Round 14: SC2Tog, SC in next 20 stitches, SC2Tog, SC until end of round (42 St).
Round 15: *SC2Tog, SC in next 5 stitches. Repeat from * to end of round (36 St).
Round 16: *SC2Tog, SC in next 4 stitches. Repeat from * to end of round (30 St).
Round 17: *SC2Tog, SC in next 3 stitches. Repeat from * to end of round (24 St).
Round 18: *SC2Tog, SC in next 2 stitches. Repeat from * to end of round (18 St).
Round 19: *SC2Tog, SC in next stitch. Repeat from * to end of round (12 St).
Attach Eyes and Embroider Nose
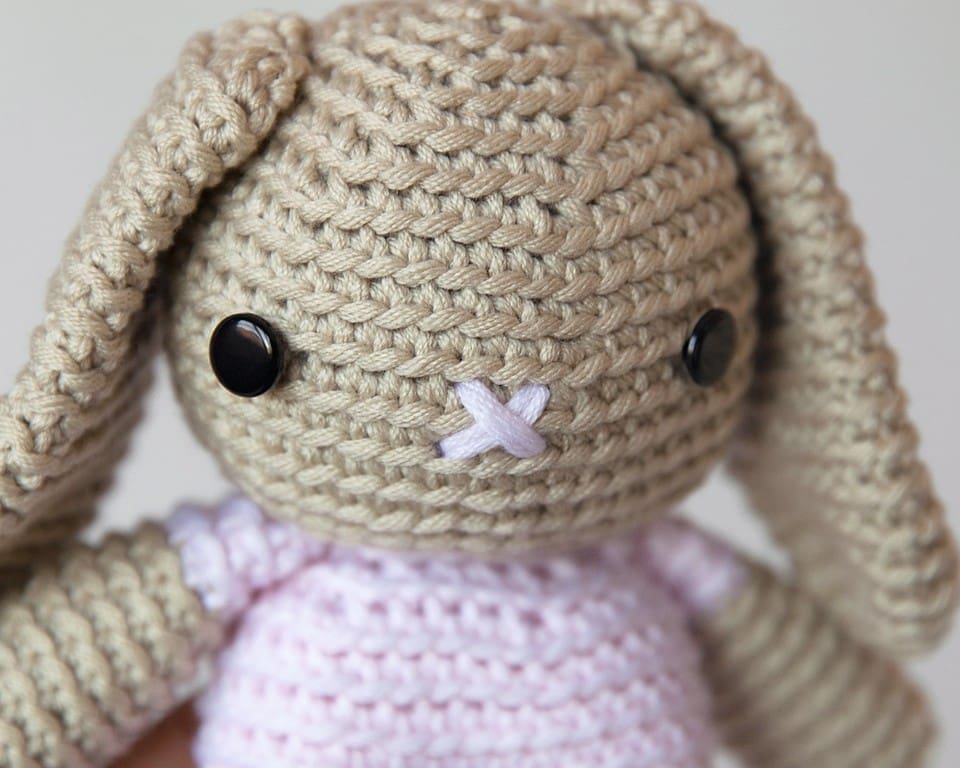
Attach the eyes between rounds 10 and 11. Space them 11 stitches apart (see photo below for guide). Then, embroider on the nose at the midpoint between the eyes with the centre of the nose going over round 11. Finally, after you’ve added the nose and eyes, stuff the head with the poly-fil and continue on to the next round where we start to work the body.
Crochet the Body
Round 20: *SC twice in next stitch, SC in next stitch. Repeat from * until end of round (18 St).
Switch to Color B:
Round 21: *SC twice in next stitch, SC in next 2 stitches. Repeat from * until end of round (24 St).
Round 22: *SC twice in next stitch, SC in next 3 stitches. Repeat from * until end of round (30 St).
Round 23: *SC twice in next stitch, SC in next 4 stitches. Repeat from * until end of round (36 St).
Round 24-29: SC in each stitch (36 St).
Switch to Color A:
Round 30: SC in each stitch (36 st).
Round 31: *SC2Tog, SC in next 4 stitches. Repeat from * to end of round (30 St).
Round 32: *SC2Tog, SC in next 3 stitches. Repeat from * to end of round (24 St).
Round 33: *SC2Tog, SC in next 2 stitches. Repeat from * to end of round (18 St).
Round 34: *SC2Tog, SC in next stitch. Repeat from * to end of round (12 St).
Stuff the body with poly-fil.
Round 35: *SC2Tog. Repeat from * to end of round (6 St).
Round 36: SC next stitch and 4th stitch together, leaving remaining stitches unworked (1 St). Then fasten off and pull yarn into the body of the bunny using crochet hook (to hide it).
Crochet the Bunny’s Floppy Ears:
With color A, make a magic circle or adjustable ring.
Round 1: Make 6 SC in magic circle (6 St).
Round 2: SC twice in each stitch (12 St).
Round 3: *SC twice in next stitch, SC in next stitch. Repeat from * until end of round (18 St).
Round 4: *SC twice in next stitch, SC in next 2 stitches. Repeat from * until end of round (24 St).
Round 5-11: SC in each stitch (24 St).
Round 12: SC2Tog, SC in next 11 stitches, SC2Tog, SC to end of round (22 St).
Round 13-14: SC in each stitch (22 St).
Round 15: SC2Tog, SC in next 10 stitches, SC2Tog, SC to end of round (20 St).
Round 16-17: SC in each stitch (20 St).
Round 18: SC2Tog, SC in next 9 stitches, SC2Tog, SC to end of round (18 St).
Round 19-21: SC in each stitch (18 St).
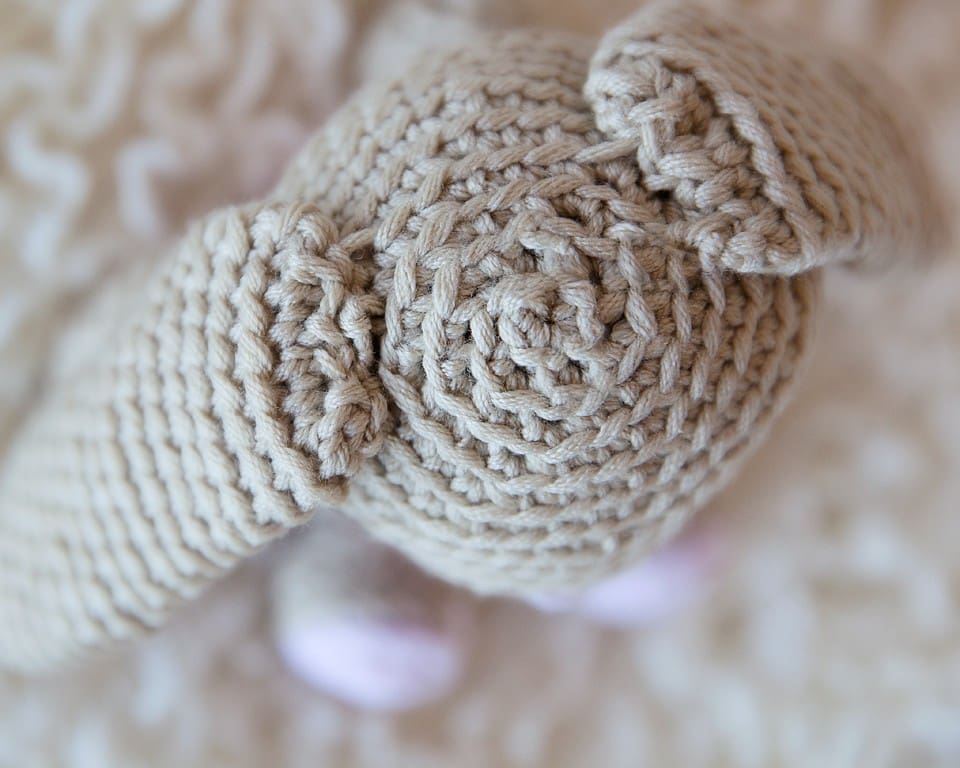
Fasten off. Do not stuff the ears because you want them to be loose and floppy. Then attach the ears evenly spaced 4 rows down from the top of the head.
Crochet the Bunny’s Tail:
With color A, make a magic circle or adjustable ring
Round 1: Make 6 SC in magic circle (6 St).
Round 2: SC twice in each stitch (12 St).
Round 3: *SC twice in next stitch, SC in next stitch. Repeat from * until end of round (18 St).
Round 4: SC in each stitch (18 St).
Round 5: *SC2Tog, SC in next stitch. Repeat from * to end of round (12 St).
Round 6: *SC2Tog. Repeat from * to end of round (6 St).
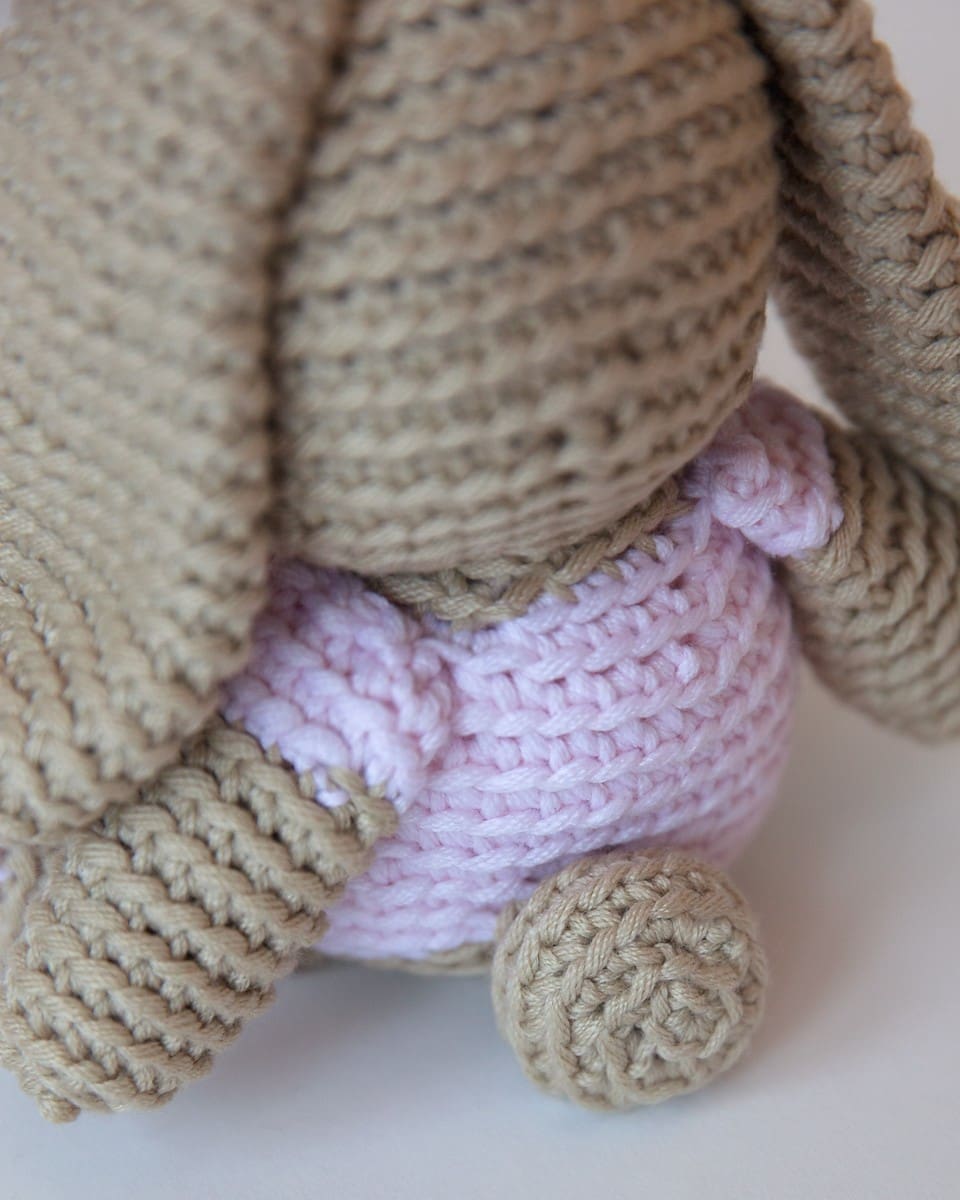
Fasten off and then stuff the tail with poly-fil. Then attach tail to the back of the bunny’s body (6 rounds up from bottom of body).
Crochet the Bunny’s Legs:
With color B, make a magic circle or adjustable ring
Round 1: Make 6 SC in magic circle (6 St).
Round 2: SC twice in each stitch (12 St).
Round 3: *SC twice in next stitch, SC in next stitch. Repeat from * until end of round (18 St).
Switch to Color A
Round 4-6: SC in each stitch (18 St).
Round 7: *SC2Tog, SC in next stitch. Repeat from * to end of round (12 St).
Stuff the foot with poly-fil.
Rounds 8-12:SC in each stitch (12 St).
Fasten off and then attach legs evenly spaced 3 rows up from bottom of body.

Crochet the Bunny’s Arms:
The final step in this free crochet bunny pattern is to crochet the bunny’s arms.
With color A, make a magic circle or adjustable ring
Round 1: Make 6 SC in magic circle (6 St).
Round 2: SC twice in each stitch (12 St).
Round 3: SC twice in next stitch, SC in next 5 stitches, SC twice in next stitch, SC to end of round (14 St).
Rounds 4-10: SC in each stitch (14 St).
Switch to Color B:
Rounds11-13: SC in each stitch (14 St).
Fasten off.
Finally, lightly stuff the arms and attach them to the sides of the body at row 21 with 8 stitches between the arms. You now have an adorable little bunny rabbit that you crocheted all by yourself!
Pattern PDF File
I hope you enjoyed this free crochet bunny pattern.
If you’d like your own copy, the Ad-Free PDF file (which will be emailed to you automatically) can be purchased through Ravelry, or by clicking the “Purchase PDF File” button to the right.
Thank you so much for your support! It means the world to me, and I’m beyond grateful to be able to share my passion with you all.
