How to Block Knitting Projects
Blocking Your Knitting – What Does it Mean?
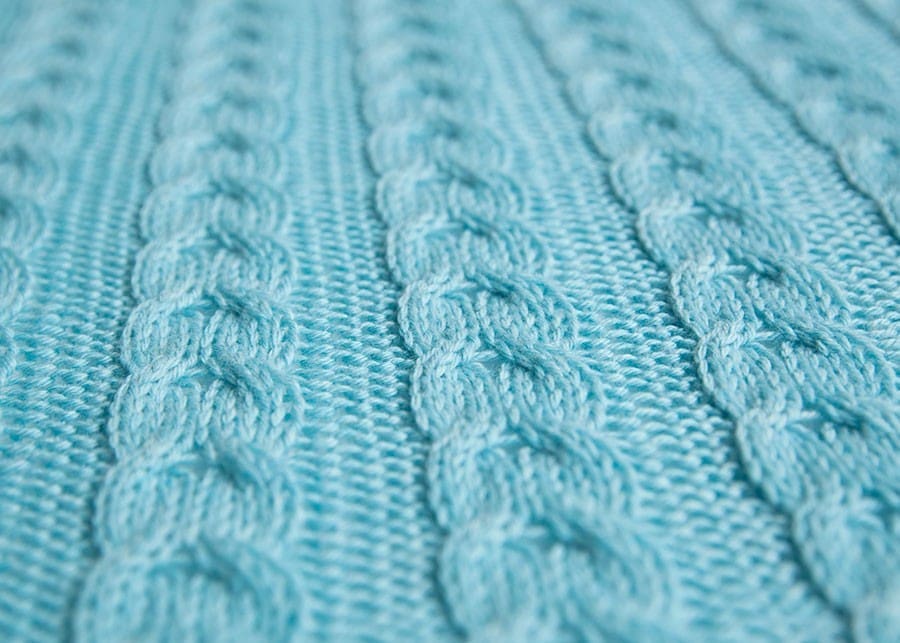
Blocking is the process of shaping and setting your finished knitting to help it look its best. Once you’ve cast off, your project might look a little uneven or curled at the edges, which is totally normal! When you block your knitting, the goal is to smooth everything out, even up your stitches, and bring out the texture of cables or lace in your work. You don’t always have to block your knits, but if you can, it can make all the difference in making your work look professional and finished.
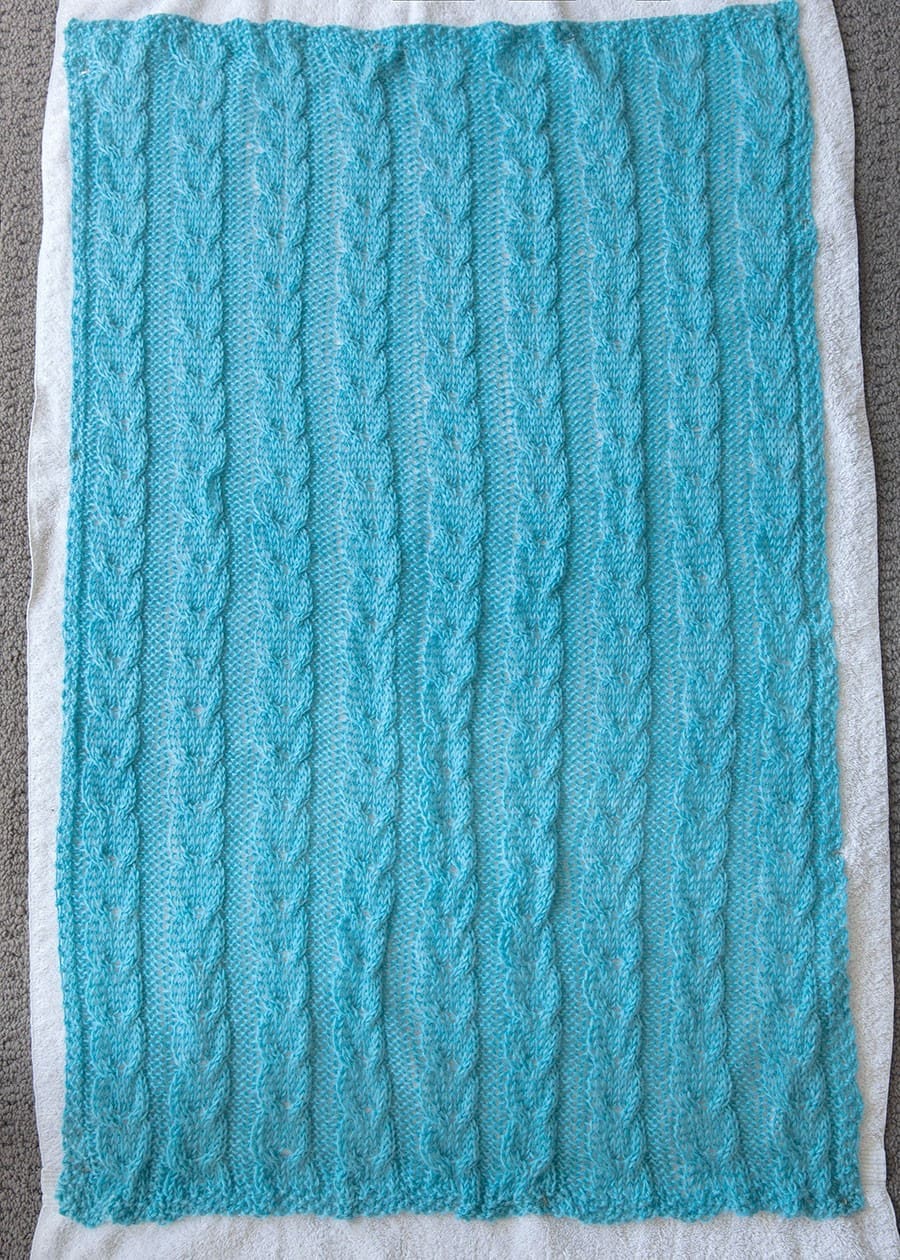
Depending on the yarn and pattern, you can block by soaking the piece and laying it flat to dry, or by using steam to relax the fibers into place. In this post, I’ll walk you through how I blocked a baby blanket that I made. I blocked this blanket by soaking it in water, but steam would have worked great too.
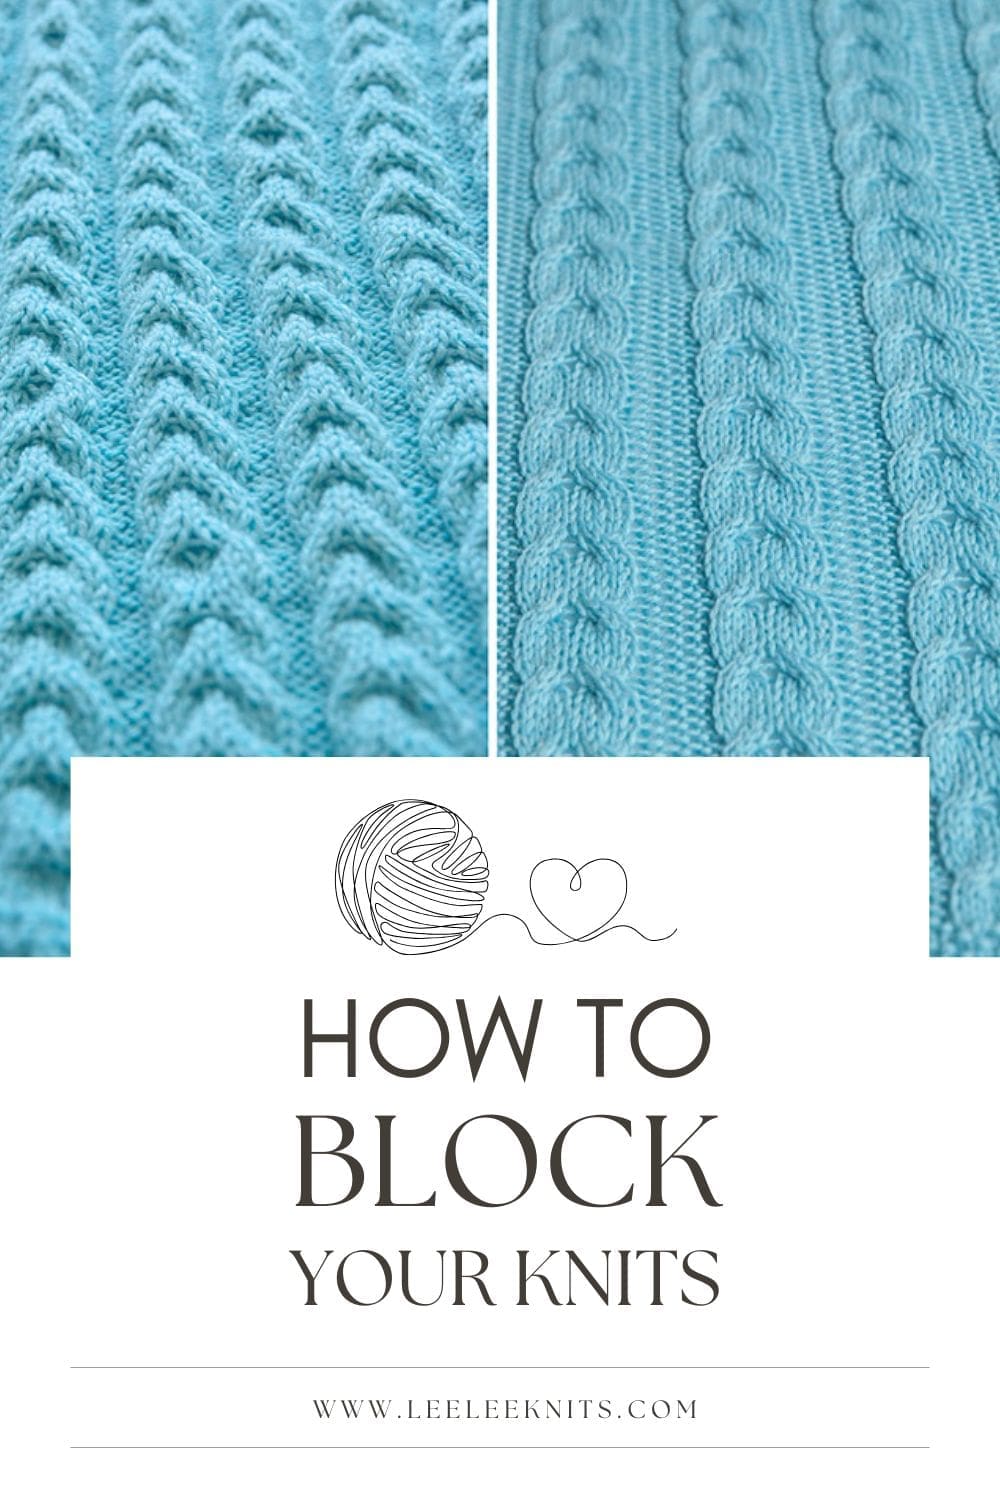
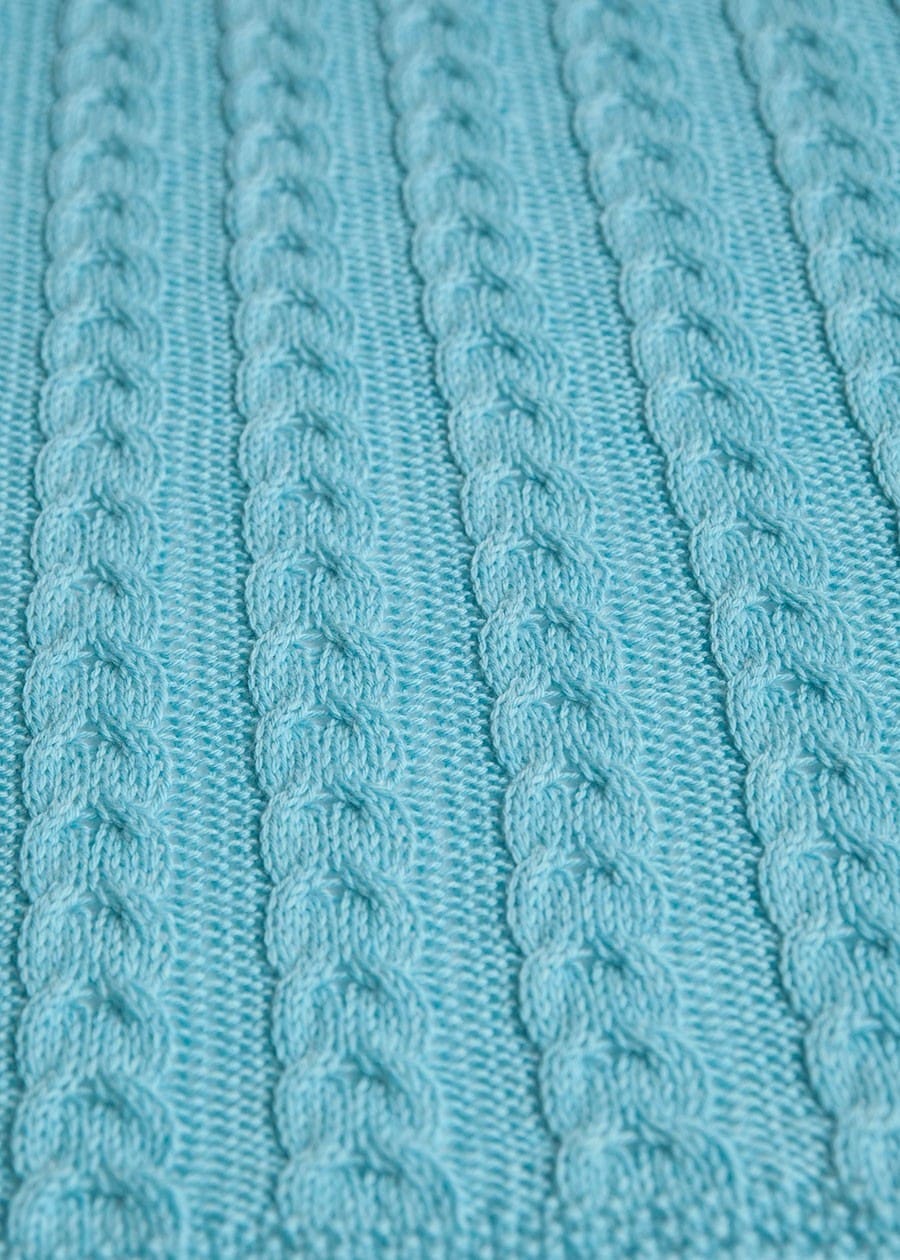
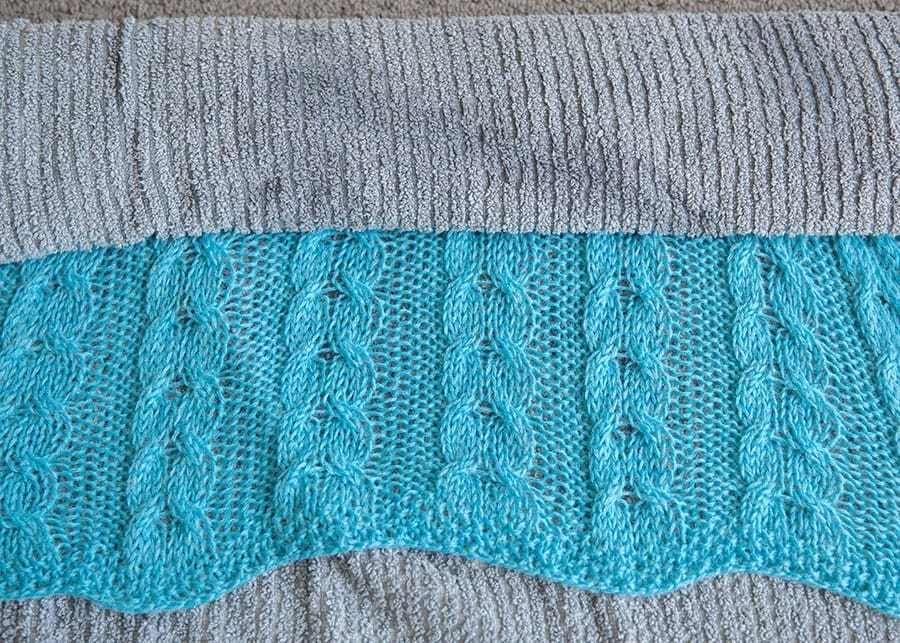
The photo below shows how much blocking can improve the look of your knitting. In the first photo, the cables appear lumpy and raised. After soaking in water, the yarn fibers relax and lay flat. The difference is dramatic—they almost don’t look like the same stitch. Blocking results won’t always be this noticeable, but it can really elevate the final look and feel of your project.

One thing you can’t tell from the photo is that the unblocked blanket was much smaller. The blocking process increased the dimensions of the blanket considerably. The initial measurements were 27 inches x 19 inches, and after blocking the blanket measured 37 inches x 24 inches! This illustrates that blocking is a great way to shape your knitting so it matches the pattern’s dimensions. Just keep in mind—different yarns behave differently. Natural fibers like wool or cotton tend to stretch more, while acrylic doesn’t move as much.
Why Block Knitting Projects?
To help you understand why and when blocking can make a difference, here’s a quick list of reasons you might want to block your knits:
- Smooth out any lumps or bumps.
- Help your stitches look more even and uniform.
- Stretch and shape your project to match the pattern’s measurements.
- Add a bit of extra length if needed.
Pin It for Later!
I hope you enjoy this article on blocking your knitting projects! Please feel free to save it on Pinterest for later or share on social media.
I truly appreciate all of you who get the word out about this site and my patterns!
XoXo,
Alnaar
Before You Block – Precautions!
Before blocking any knitting project, always check the yarn’s wash and care instructions first. Some materials and novelty yarns can’t be wet at all. Acrylic yarns, for example, don’t change much with water, so steam blocking usually works better. The heat helps set the shape by slightly melting the plastic fibers. But be careful—too much heat can damage the yarn. It’s definitely a bit of trial and error! I recommend knitting a small swatch first so you can test how your yarn reacts to steam or soaking.
The yarn that I used for the blanket above is Knit Picks Swish worsted weight yarn, which is 100% Superwash Merino Wool. While this yarn changed significantly after it was wet, not all yarns will have the same result. That’s why is very important to understand the fibre content and care instructions of the yarn you are using before you block the finished project. The care instructions for Swish indicate machine washing on the gentle cycle is fine, so I wasn’t worried about wetting the blanket.
Getting Started – What you will Need to Block your Knits
- Towels and or blocking mats.
- Tape measure.
- T-Pins for pinning your work.
- Your knitting or crochet pattern to reference for the finished dimensions.
- Spray bottle or sink/basin filled with water.
- Soak Wash – optional but nice to clean the fabric and add a light fragrance.
- Hand held steamer (for steam blocking only) – not necessary for wet blocking.
- Flat even surface to lay out your work. I use the carpeted floor in my bedroom.
5 Steps to Block your Knitting Project
Once you’ve gathered the materials above, you’re ready to block your knitting project! Follow the steps below if you are going to wet block. For steam blocking, you can skip steps 2 and 3.
Step 1: Weave in all loose ends
Weave in the loose ends before you start. The wet blocking process will actually help lock in the weaved in ends.
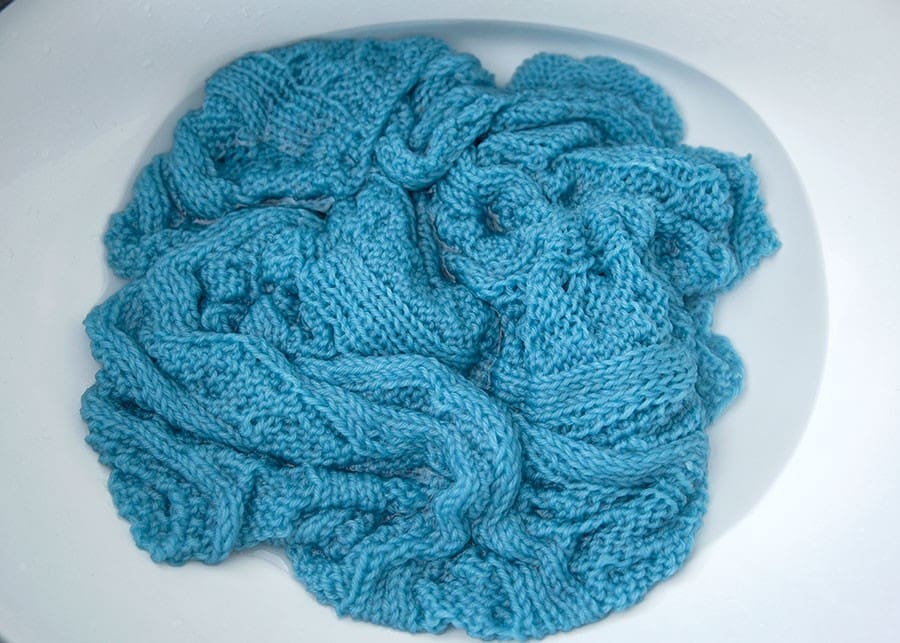
Step 2: Wet the Fabric
You can wet the fabric either by soaking it in a sink or basin full of water, or by laying it flat and spraying it with spray bottle until the fibres are very wet. Skip this step if you are going to use a steamer to block your project.
Step 3: Gently Remove the Excess Water
Very gently press out the excess water. Be careful not to wring out the water as you will damage the delicate fibres. For large projects like blankets, carefully lay it out flat on a thick towel and then roll it so that the towel absorbs the extra water as shown in the photos below.
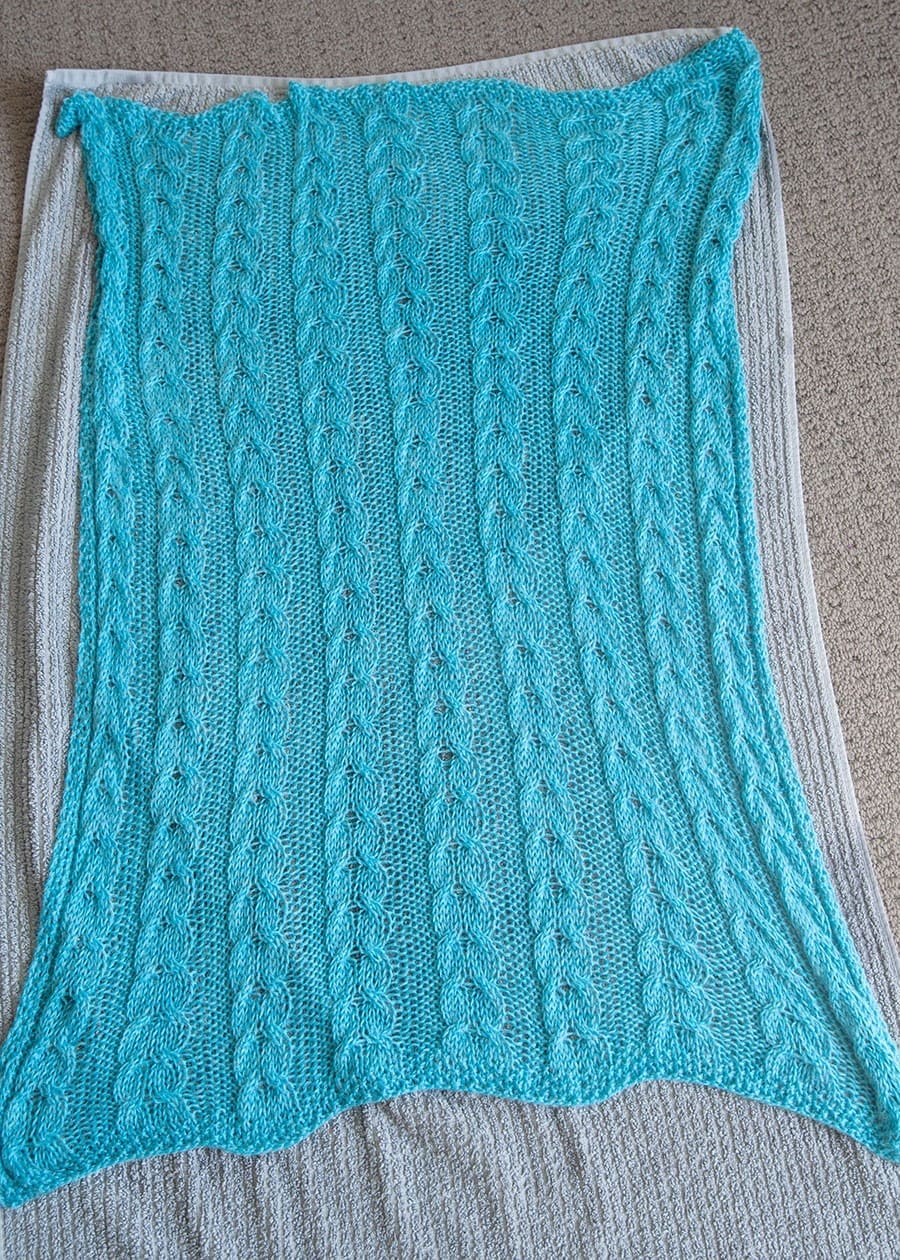
Step 4: Pin into Place and Dry
Lay the knit fabric out on a towel or blocking mat and then pin into place. Your knit will dry exactly how you have laid it out. Use a tape measure to ensure that all sides are even and symmetrical and match your pattern requirements.
If you’re steam blocking, stretch the dry fabric to the pattern measurements before pinning. Then use a handheld steamer to gently release steam over the knit fabric until it is damp. The combination of heat and water allows you to not have to completely soak the fabric.
Step 5: Wait Until Dry
The final step is to wait 24-48 hours until your work is completely dry. Note that the time will be less for steam blocking since the fabric won’t be as wet.
That’s it! Remove the pins and enjoy your professionally blocked knit project.
If you’d like to make the same blanket I used in this post, the printable PDF version of the pattern is available for purchase.
You can find it on Ravelry or by clicking the “Purchase PDF File” button to the right. The PDF is ad-free and easy to follow—perfect for printing or keeping on your tablet while you knit.
Thanks so much for reading! I hope this post helped take the mystery out of blocking—and maybe even inspired your next project.


This is a great idea and adds a wonderful look to the blanket . I am impressed the blanket is larger as well this is neat.
looks great. Do you need to wet block after every wash?
Great question! It depends on the yarn. Some yarns do lose their shape when wet, so its a good idea to lay flat to dry. You can usually tell by the care instructions on the yarn label.
I have stirred up quite a discussion on a FB knitting group by sharing the dramatic change after wet blocking the cable blanket. I, too, thought it must be two separate cable stitches, but after seeing the photos of the process, I saw the transformation. I have a feeling that some did not bother to go look!
It’s crazy what a difference wet blocking makes! You have to see it to believe it lol.