Crochet Slipper Socks

Crochet Slipper Socks to Keep your Toes Toasty!
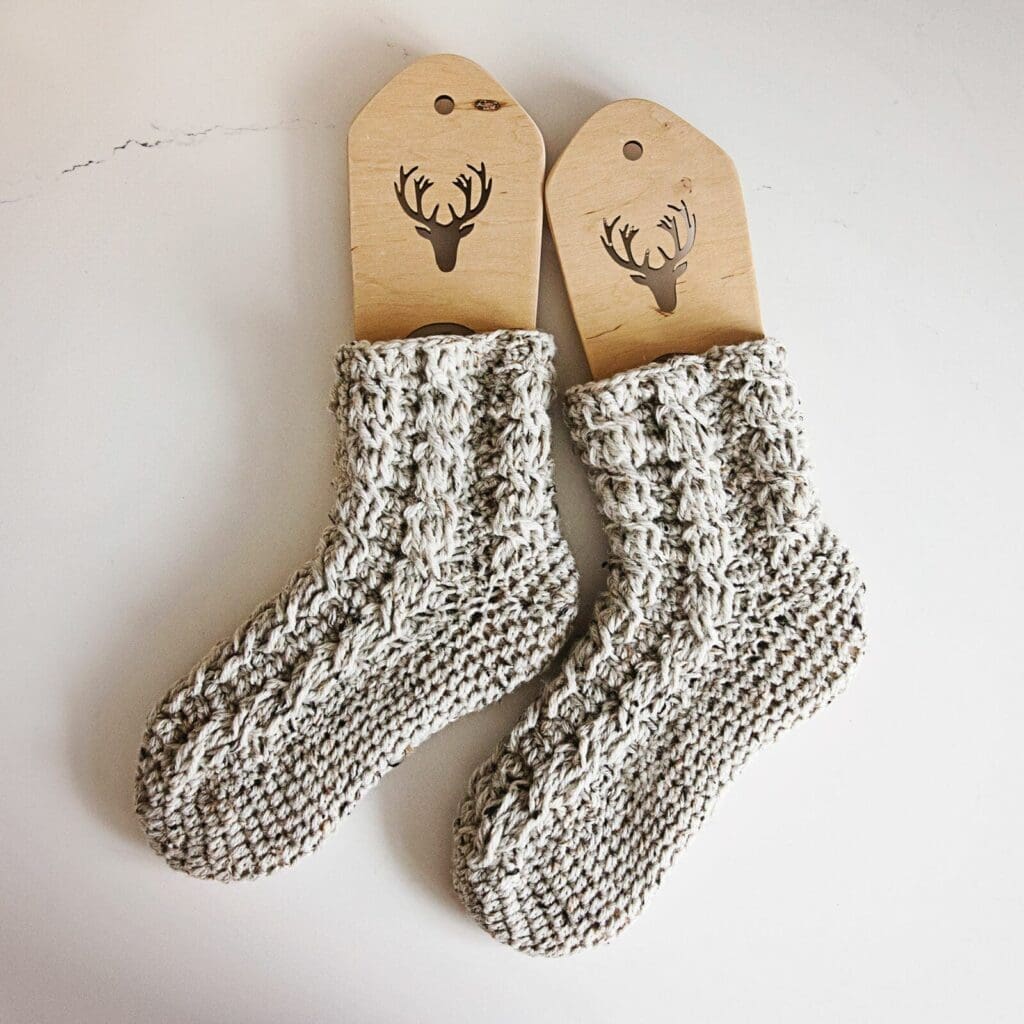
I’ve been getting tons of requests for a crochet sock pattern, and guess what—it’s finally here! When designing this pattern, I wanted to keep it simple and beginner-friendly, so even if you’ve never crocheted socks before, these thick and cozy slipper socks will be a fun, quick project.
And with Christmas quickly approaching…. these comfy slipper socks make the perfect holiday gift! In my opinion, handmade gifts have that extra touch of thoughtfulness, and nothing says “I care” like a pair of soft, warm socks you made yourself. Whether you’re crocheting them for family, friends, or even as a little treat for yourself, these socks will be so appreciated. They’re warm, practical, and just the right amount of cozy for the winter season. So if you’re looking for a quick and meaningful gift idea, you have to make these socks!
Pattern Design and Yarn Choice
I chose to work with Wool of the Andes Tweed worsted weight yarn from We Crochet for this crochet slipper socks pattern. It’s a gorgeous textured wool yarn, that is also very well priced. If you choose to use the same yarn (or any wool yarn), keep in mind that you do have to hand wash the socks, and lay them flat to dry.
The socks are crocheted from the toe up, with an after thought heel, which is a technique where the heel is added after the rest of the sock is completed, instead of being worked as you go. From my experience, this is the simplest way to work a heel.
To make an afterthought heel, you just crochet the entire body of the sock, leaving an opening where the heel will eventually go. Once the main sock is finished, you come back to the opening and work the heel separately.
I also added some cables because I love them and they are also a simple way to add texture and style to any project. They also sort of act like ribbing, and add stretch, which is key when making socks!
If you’re ready to get started, scroll down for the free pattern and make these cozy slipper socks for everyone on your holiday list—or for yourself!
Pay it Forward!
I hope you enjoy this pattern as much I did creating it! Please feel free to share the link to this page on your social media or Pinterest account.
I truly appreciate all of you who get the word out about this site and my patterns!
❤️ Alnaar

Please note that some of the links on this page are affiliate links and I will earn a commission if you purchase through these links. I use all of the products listed on this page and recommend them because they are companies that I have found helpful and trustworthy. Please let me know if you have any questions about anything I have recommended!
Cozy Crochet Slipper Socks Free Pattern
Materials:
- Size G-6 (4 mm) crochet hook.
- 3 Skeins (50 grams each) of We Crochet (Knit Picks) Wool of the Andes Tweed Worsted Weight Yarn in Down Heather.
- Scissors.
- Yarn needle.
- Ruler or tape measure.
- Removable stitch markers.
Pattern PDF File
The free crochet pattern for these cozy slipper socks is available right here on this page, as this site is sustained through ad support.
If you’d like your own copy, the Ad-Free PDF file (which will be emailed to you automatically) can be purchased through Ravelry, or by clicking the “Purchase PDF File” button to the right.
Thank you so much for your support! It means the world to me, and I’m beyond grateful to be able to share my passion with you all.
Size:
The width of these stretchy slipper socks is perfect for a typical adult female foot. The length can be customized in the pattern.
Gauge:
3.5 stitches, 3 rows = 1 inch in HDC.
Abbreviations:
CH: Chain.
HDC: Half Double Crochet
CSHDC: Chainless Starting Half Double Crochet.
DC: Double Crochet.
More Crochet Patterns from Leelee Knits!
Free Crochet Slipper Socks Pattern:
These crochet slipper socks are worked from the toe up, with an afterthought heel. Follow the instructions below for each sock.
Toe:
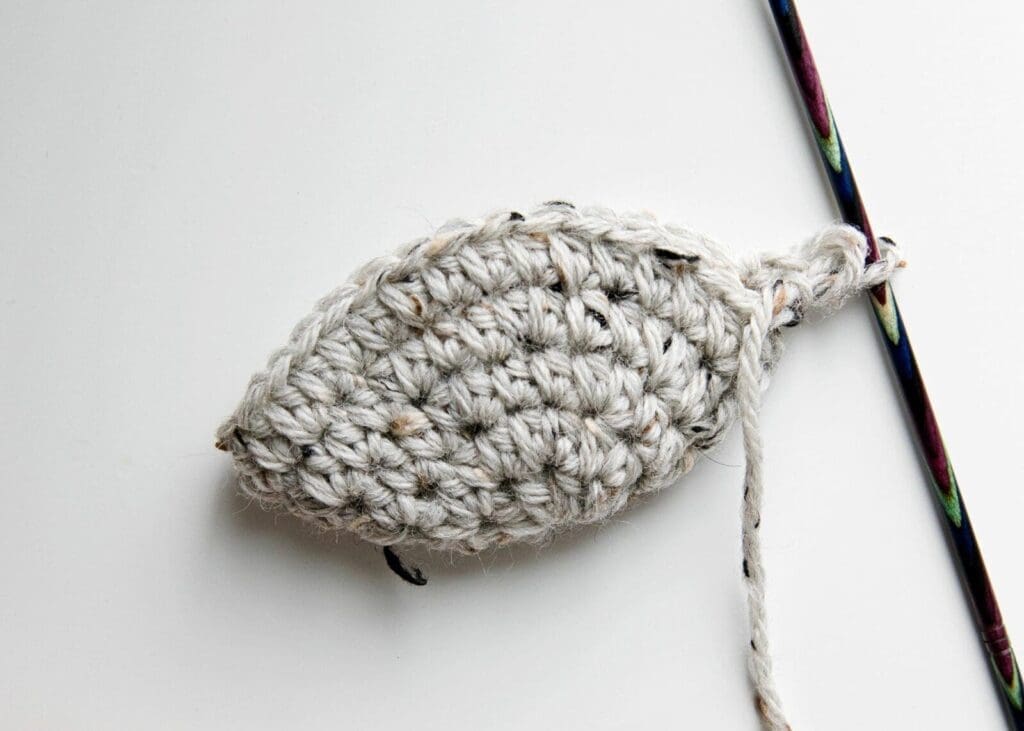
Make a magic circle. The toe is worked in spirals; do not join at beginning of each round. It’s a good idea to use a removable stitch marker to mark beginning of each round.
Round 1: CH2, 9HDC into magic circle.
Round 2: 2HDC in each hdc until end of round (18 stitches).
Round 3: *HDC in next 2 hdc, 2HDC in next hdc; repeat from * to end of round (24 stitches).
Round 4: *HDC in next 2 hdc, 2HDC in next hdc; repeat from * to end of round (32 stitches).
Continue to Foot.
Foot:
Join with a slip stitch to first stitch of previous round.
From here on, the rounds are joined and no longer worked in spirals. Join using the chainless starting HDC (CSHDC) and invisible slip stitch. If you have not used this method before, watch the following Leelee Knits video tutorial that will walk you through it:
Round 1: CSHDC in first stitch, HDC in each remaining stitch; join to beginning of round.
Round 2: CSHDC in first stitch; *skip next 2 hdc, work FPDC around stitch one row below the next 2 hdc, working in front of FPDC just made, work FPDC around stitch one row below each skipped hdc; HDC in next hdc*; repeat from * to * two more times; HDC in remaining 16 hdc; join to beginning of round.
Round 3: CSHDC in first stitch, HDC in each remaining stitch; join to beginning of round.
Round 4: CSHDC in first stitch; *FPDC around next 4 fpdc, HDC in next hdc*; repeat from * to * two more times; HDC in remaining 16 hdc; join to beginning of round.
Repeat rounds 1-4 until your work measures just under or equal to 2 inches less than the length of the foot (from top of toes to end of heel). The remaining 2 inches will be made up when you work the heel. For example, my feet measure 9.5 inches, so I work the foot until the total length is 7.5 inches long (including the toe part).

Continue to Heel Placement.
Heel Placement:
Round 1: CSHDC in first stitch, HDC in each remaining stitch; join to beginning of round.
Round 2: CSHDC in first stitch; *skip next 2 hdc, work FPDC around stitch one row below the next 2 hdc, working in front of FPDC just made, work FPDC around stitch one row below each skipped hdc; HDC in next hdc*; repeat from * to * two more times; HDC in remaining 16 hdc; join to beginning of round.
Round 3: CSHDC in first stitch, HDC in next 15 stitches; loosely chain 16 and skip the remaining 16 hdc; join to beginning of round.
Round 4: CSHDC in first stitch; *FPDC around next 4 fpdc, HDC in next hdc*; repeat from * to * two more times; HDC in each of the 16 chains; join to beginning of round.

Continue to Leg.
Leg:
Round 1: CSHDC in first stitch, HDC in each remaining stitch; join to beginning of round.
Round 2: CSHDC in first stitch; *skip next 2 hdc, work FPDC around stitch one row below the next 2 hdc, working in front of FPDC just made, work FPDC around stitch one row below each skipped hdc; HDC in next hdc*; repeat from * to * two more times; HDC in next hdc; repeat from * to * three times for remaining 15 hdc; join to beginning of round.
Round 3: CSHDC in first stitch, HDC in each remaining stitch; join to beginning of round.
Round 4: CSHDC in first stitch; *FPDC around next 4 fpdc, HDC in next hdc*; repeat from * to * two more times; HDC in next hdc; repeat from * to * three times for remaining 15 hdc; join to beginning of round.
Repeat rounds 1-4 three more times. Fasten off.
Continue to Heel.
Heel:
With the back of the sock facing you, join yarn in top of the 9th stitch of the skipped stitches at the back of the foot.
Round 1: CSHDC in the same stitch, HDC in each stitch until the last stitch before the corner gap; HDC3tog with last stitch before the gap, a spot in the gap, and the first chain from the foundation ch of the back part of the leg; place a maker in this stitch; HDC in each ch until the ch before the next gap; HDC3tog with the last ch, a spot in the gap, and the first hdc of the back of the foot; place a marker in this stitch; HDC in the remaining hdc; join to first stitch of round (30 stitches).
Round 2: CSHDC in first stitch; HDC in each hdc until one stitch before the marker; HDC3tog and move marker to this stitch; HDC in each hdc until one stitch before the next marker, HDC3Tog and move marker to this stitch; HDC in the remaining hdc; join to first stitch of the round.
Repeat round 2 until 18 stitches remain. Join to beginning of next round and fasten off leaving a long tail to sew the seam.

Continue to Finishing.
Finishing:
Using tail and tapestry/yarn needle, seam heel closed and weave in all loose ends!
Pattern PDF File
I hope you enjoyed this free crochet pattern for a cozy pair of slipper socks.
If you’d like your own copy, the Ad-Free PDF file (which will be emailed to you automatically) can be purchased through Ravelry, or by clicking the “Purchase PDF File” button to the right.
Thank you so much for your support! It means the world to me, and I’m beyond grateful to be able to share my passion with you all.






Hi do you crochet US or UK terminology
Hi Joanne, All of my patterns are in US terminology.
When you start working the cable, does the stitch count stay at 32? It just seems the stitch count doesn’t add up, but I’ve never worked cables in crochet.
Hi Emily, the stitch count should not change.