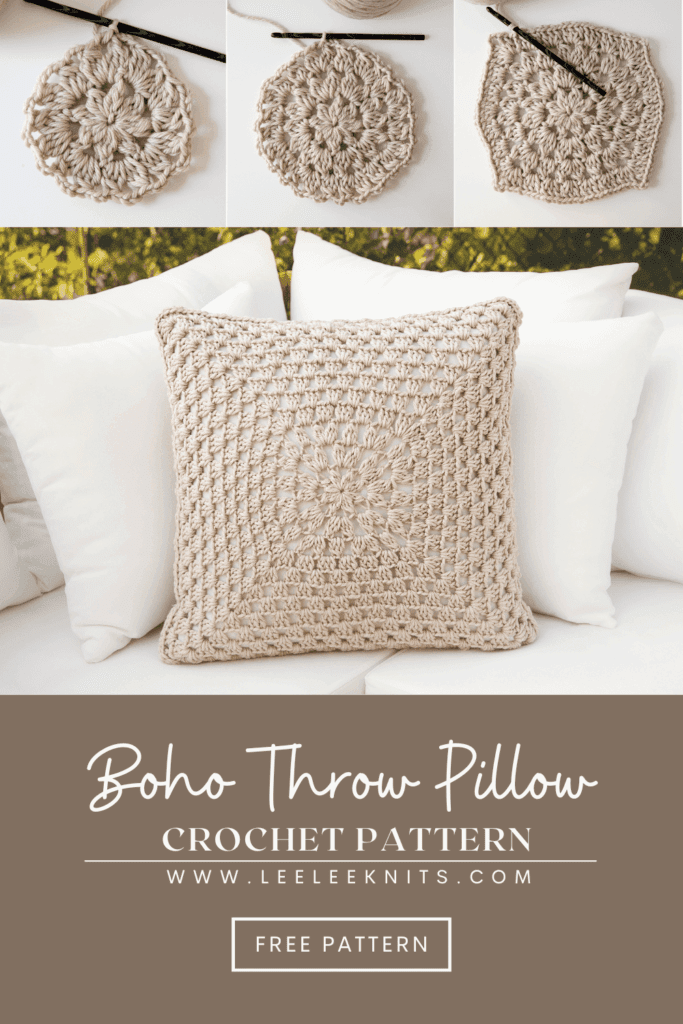
Crochet Pillow Cover Pattern
Crochet Your Own Cozy Throw Pillows !
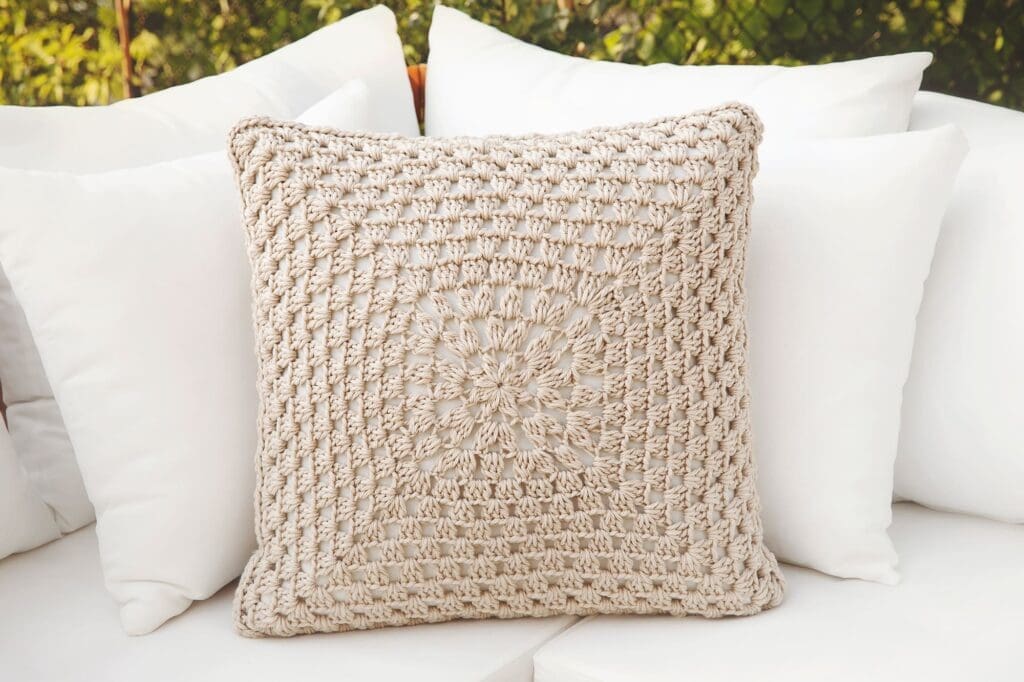
I’ve been updating our sofa throw pillows over the past few weeks. I bought a few, and then decided to crochet a couple of them myself. After all, crochet pillows add an extra cozy vibe, which I absolutely love! In doing so, I came up with a new crochet pillow cover pattern! And as usual, I’m so stoked to share it with you guys! This is a quick and simple pattern and I took lots of photos so that it would be as easy as possible to follow.
Share and Save this Crochet Pillow Cover Pattern for Later!
I hope you enjoy this pattern! If so, please feel free to share the link to this page on your social media or Pinterest account.
I truly appreciate all of you who get the word out about this site and my patterns!
❤️
Alnaar
For this pillow, I chose We Crochet’s Swish Bulky weight yarn in Nutmeg Heather since I wanted to soften the space up. Plus, Bulky yarn is great for crocheting pillow covers for a couple of reasons. First of all, it works up quickly, so you can make a few covers in no time. This is perfect if you’re selling your creations or just don’t have a lot of time to spend on each one. And secondly, bulky yarn is super squishy—which is exactly what you want when you’re making a pillow cover, of course!
As I mentioned earlier, I’ve included plenty of photos throughout the pattern. That way, if you’re a visual learner, you’ll have extra support every step of the way. Also, I know many of you like to double-check that you’re on the right track as you go. With that in mind, these photos are here to guide you through the rounds!

Free Boho Crochet Pillow Cover Pattern
Please note that some of the links on this page are affiliate links, which means that I will earn a commission if you purchase through these links. I use all of the products listed on this page and recommend them because they are companies that I have found helpful and trustworthy. Please let me know if you have any questions about anything I have recommended.
Materials:
You will need the following materials to crochet one pillow cover (2 panels).
- 3.75 skeins (514 yards) of We Crochet Swish Bulky Weight Yarn.
- Size I-9 (5.5 mm) crochet hook.
- 20” X 20” Pillow Form.
- Tapestry/yarn needle.
Ad Free PDF File
The free pattern for the Boho Crochet Pillow Cover is available right here on this page, as this site is sustained through ad support.
If you like things a little more streamlined, I’ve put together an ad-free, downloadable PDF version of the pattern. It’s perfect for easy printing and can be can be purchased through My Ravelry Store or by clicking the “Purchase PDF File” button to the right.
Thank you so much for your support! It means the world to me, and I’m beyond grateful to be able to share my passion with you all.
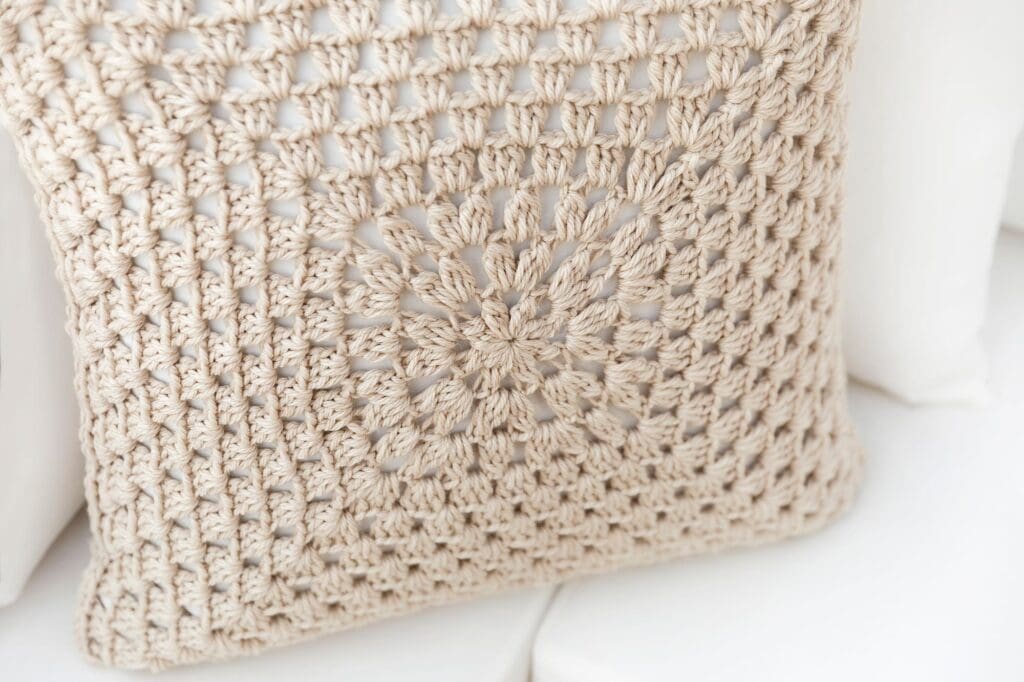
Measurements:
Each square panel will measure 20″ X 20″.
Abbreviations and Special Stitches:
Ch: Chain.
Sc: Single Crochet.
Dc: Double Crochet.
St: Stitch.
BCL (Beginning Cluster Stitch) *Yarn Over, insert hook into specified stitch and then draw up a loop; Yarn Over and draw through two loops; repeat from * once more in same stitch; Yarn Over and draw through all three loops remaining on hook.
CL (Cluster Stitch) *Yarn Over, insert hook into specified stitch and then draw up a loop; Yarn Over and draw through two loops; repeat from * two more times in same stitch; Yarn Over and draw through all four loops remaining on hook.
More Free Crochet Patterns from Leelee Knits!
Free Crochet Pillow Cover Pattern:
Repeat the following instructions to make two identical panels.
To begin, make a magic circle (also called magic loop or ring).
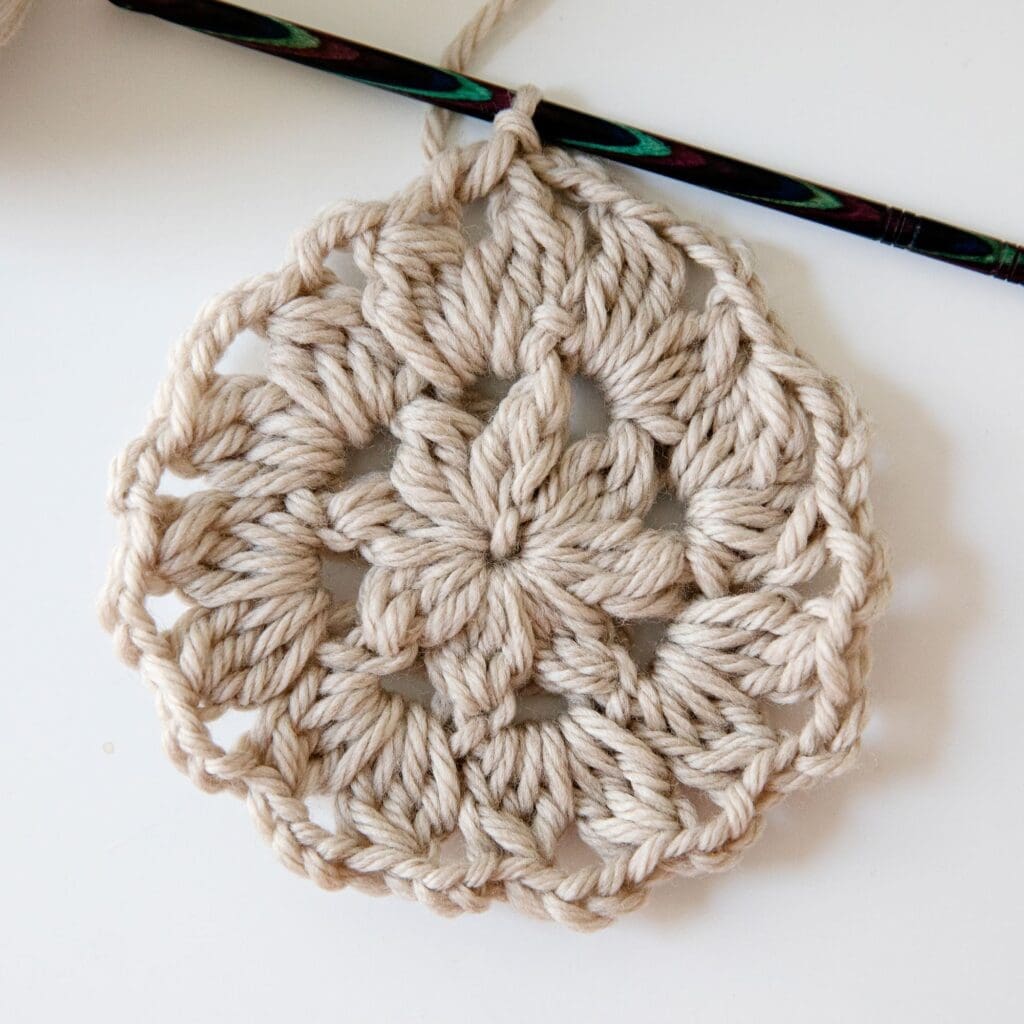
Round 1:
Working in magic ring BCL, CH3; *CL, CH3; repeat from * 6 more times; join to beginning ch3 sp with SS (8 clusters made). Then tighten ring to close the hole.
Round 2:
CH2, (BCL, CH3, CL) in same ch3 sp, CH3; *(CL, CH3, CL) in next ch3 sp, CH3; repeat from * to end of round; join to beginning ch3 sp with SS (16 clusters made).
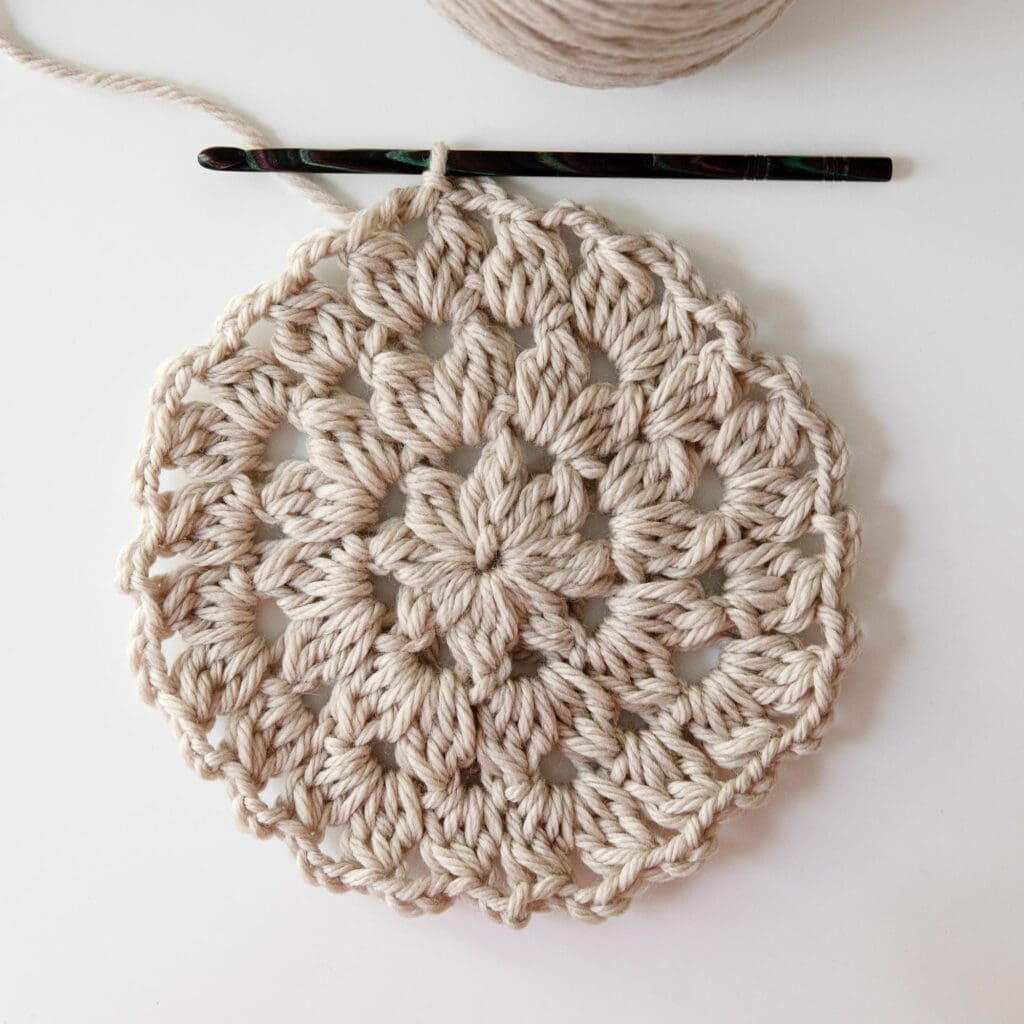
Round 3:
CH2, (BCL, CH3, CL) in same ch3 sp, CH3, CL in next ch3 sp, CH3; *(CL, CH3, CL) in next ch3 sp, CH3, CL in next ch3 sp, CH3; repeat from * to end of round; join to beginning ch3 sp with SS (24 clusters made).
Round 4:
CH3, (2DC, CH3, 3DC) in same ch3 sp, CH1; *(3DC in next ch3 sp, CH1) 5 times, (3DC, CH3, 3DC) in next ch3 sp, CH1; repeat from * 2 more times; (3DC in next ch3 sp, CH1) 5 times; join in third ch of beginning ch3.
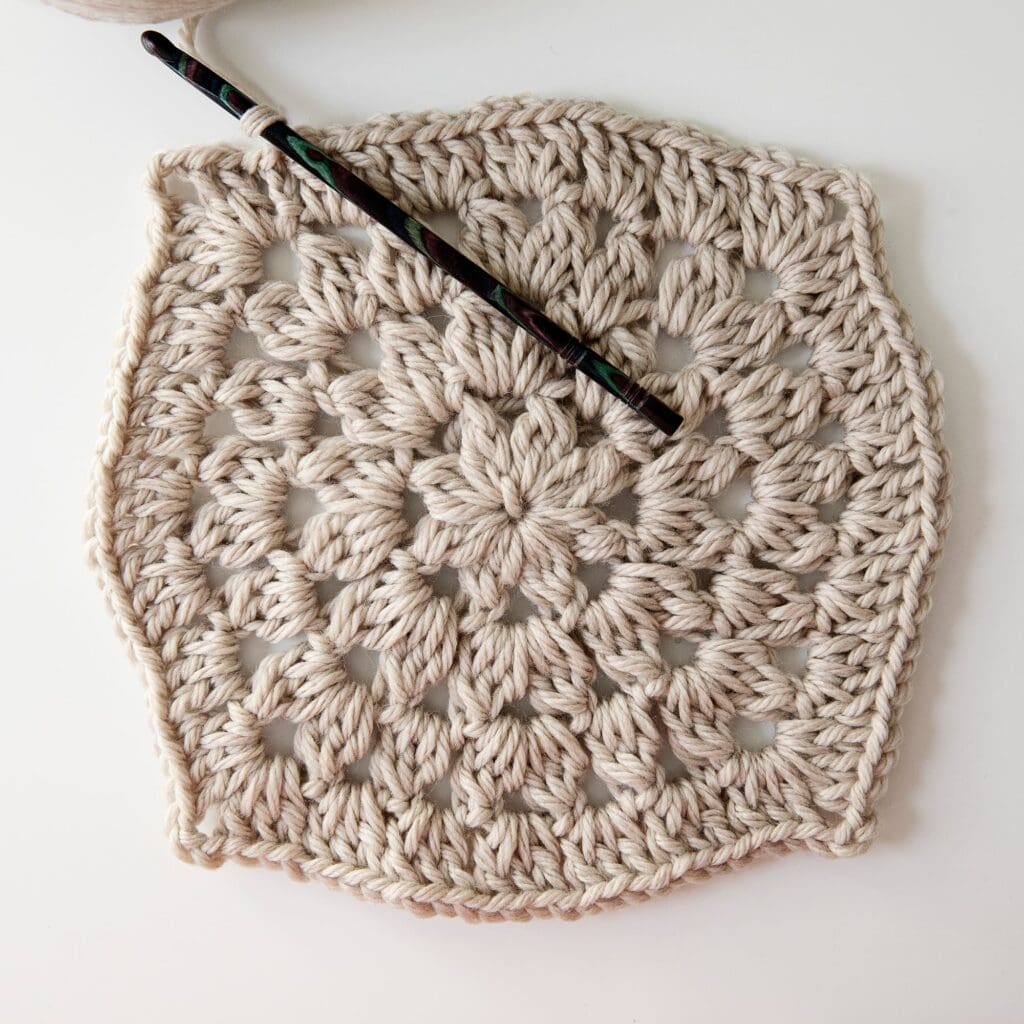
Round 5:
SS in next 2dc, CH3, (2DC, CH3, 3DC) in ch3 sp, CH1; *(3DC in next ch1 sp, CH1) 6 times; (3DC, CH3, 3DC) in next ch3 sp, CH1; repeat from * 2 more times; (3DC in next ch1 sp, CH1) 6 times; join in third ch of beginning ch3.
Round 6:
SS in next 2dc, CH3, (2DC, CH3, 3DC) in ch3 sp, CH1; *(3DC in next ch1 sp, CH1) 7 times; (3DC, CH3, 3DC) in next ch3 sp, CH1; repeat from * 2 more times; (3DC in next ch1 sp, CH1) 7 times; join in third ch of beginning ch3.
Round 7:
SS in next 2dc, CH3, (2DC, CH3, 3DC) in ch3 sp, CH1; *(3DC in next ch1 sp, CH1) 8 times; (3DC, CH3, 3DC) in next ch3 sp, CH1; repeat from * 2 more times; (3DC in next ch1 sp, CH1) 8 times; join in third ch of beginning ch3.
Round 8:
SS in next 2dc, CH3, (2DC, CH3, 3DC) in ch3 sp, CH1; *(3DC in next ch1 sp, CH1) 9 times; (3DC, CH3, 3DC) in next ch3 sp, CH1; repeat from * 2 more times; (3DC in next ch1 sp, CH1) 9 times; join in third ch of beginning ch3.
Round 9:
SS in next 2dc, CH3, (2DC, CH3, 3DC) in ch3 sp, CH1; *(3DC in next ch1 sp, CH1) 10 times; (3DC, CH3, 3DC) in next ch3 sp, CH1; repeat from * 2 more times; (3DC in next ch1 sp, CH1) 10 times; join in third ch of beginning ch3.
Round 10:
SS in next 2dc, CH3, (2DC, CH3, 3DC) in ch3 sp, CH1; *(3DC in next ch1 sp, CH1) 11 times; (3DC, CH3, 3DC) in next ch3 sp, CH1; repeat from * 2 more times; (3DC in next ch1 sp, CH1) 11 times; join in third ch of beginning ch3.
Round 11:
SS in next 2dc, CH3, (2DC, CH3, 3DC) in ch3 sp, CH1; *(3DC in next ch1 sp, CH1) 12 times; (3DC, CH3, 3DC) in next ch3 sp, CH1; repeat from * 2 more times; (3DC in next ch1 sp, CH1) 12 times; join in third ch of beginning ch3.
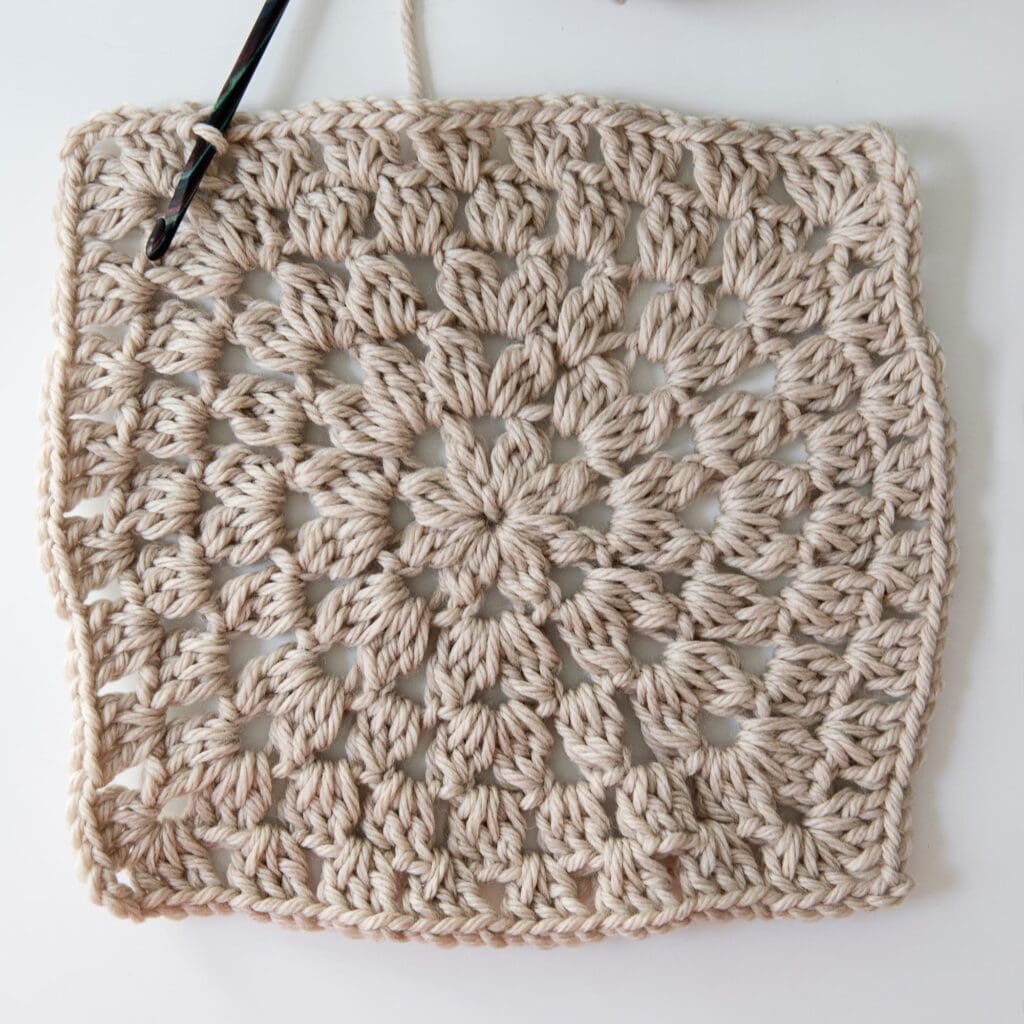
Round 12 (final round):
SS in next 2dc, CH3, (2DC, CH3, 3DC) in ch3 sp, CH1; *(3DC in next ch1 sp, CH1) 13 times; (3DC, CH3, 3DC) in next ch3 sp, CH1; repeat from * 2 more times; (3DC in next ch1 sp, CH1) 13 times; join in third ch of beginning ch3.
Fasten off for first panel. Then, once the second panel is complete, continue to Finishing Instructions without fastening off.
Finishing Instructions:
You’re now ready to finish this crochet pillow cover pattern! Begin by lining up the two panels with the right sides facing outwards. Then seam the sides together with slip stitches. After seaming 3 of the sides, insert a pillow form and then continue to seam up the last side. Finally, fasten off and weave in loose ends.
Pattern PDF File
I hope you enjoyed the free crochet pattern.
If you’d like your own copy, the Ad-Free PDF file (which will be emailed to you automatically) can be purchased through Ravelry, or by clicking the “Purchase PDF File” button to the right.
Thank you so much for your support! It means the world to me, and I’m beyond grateful to be able to share my passion with you all.